
Email and SMS newsletters
Build a newsletter in the four-step wizard — template, block editor, audience, schedule — and send it by email, SMS, or both.
Updated 2026-10-02
Newsletters let you reach your client list with news or an offer. One newsletter can send by email, SMS, or both, and every booking made from a newsletter link is attributed back to it.
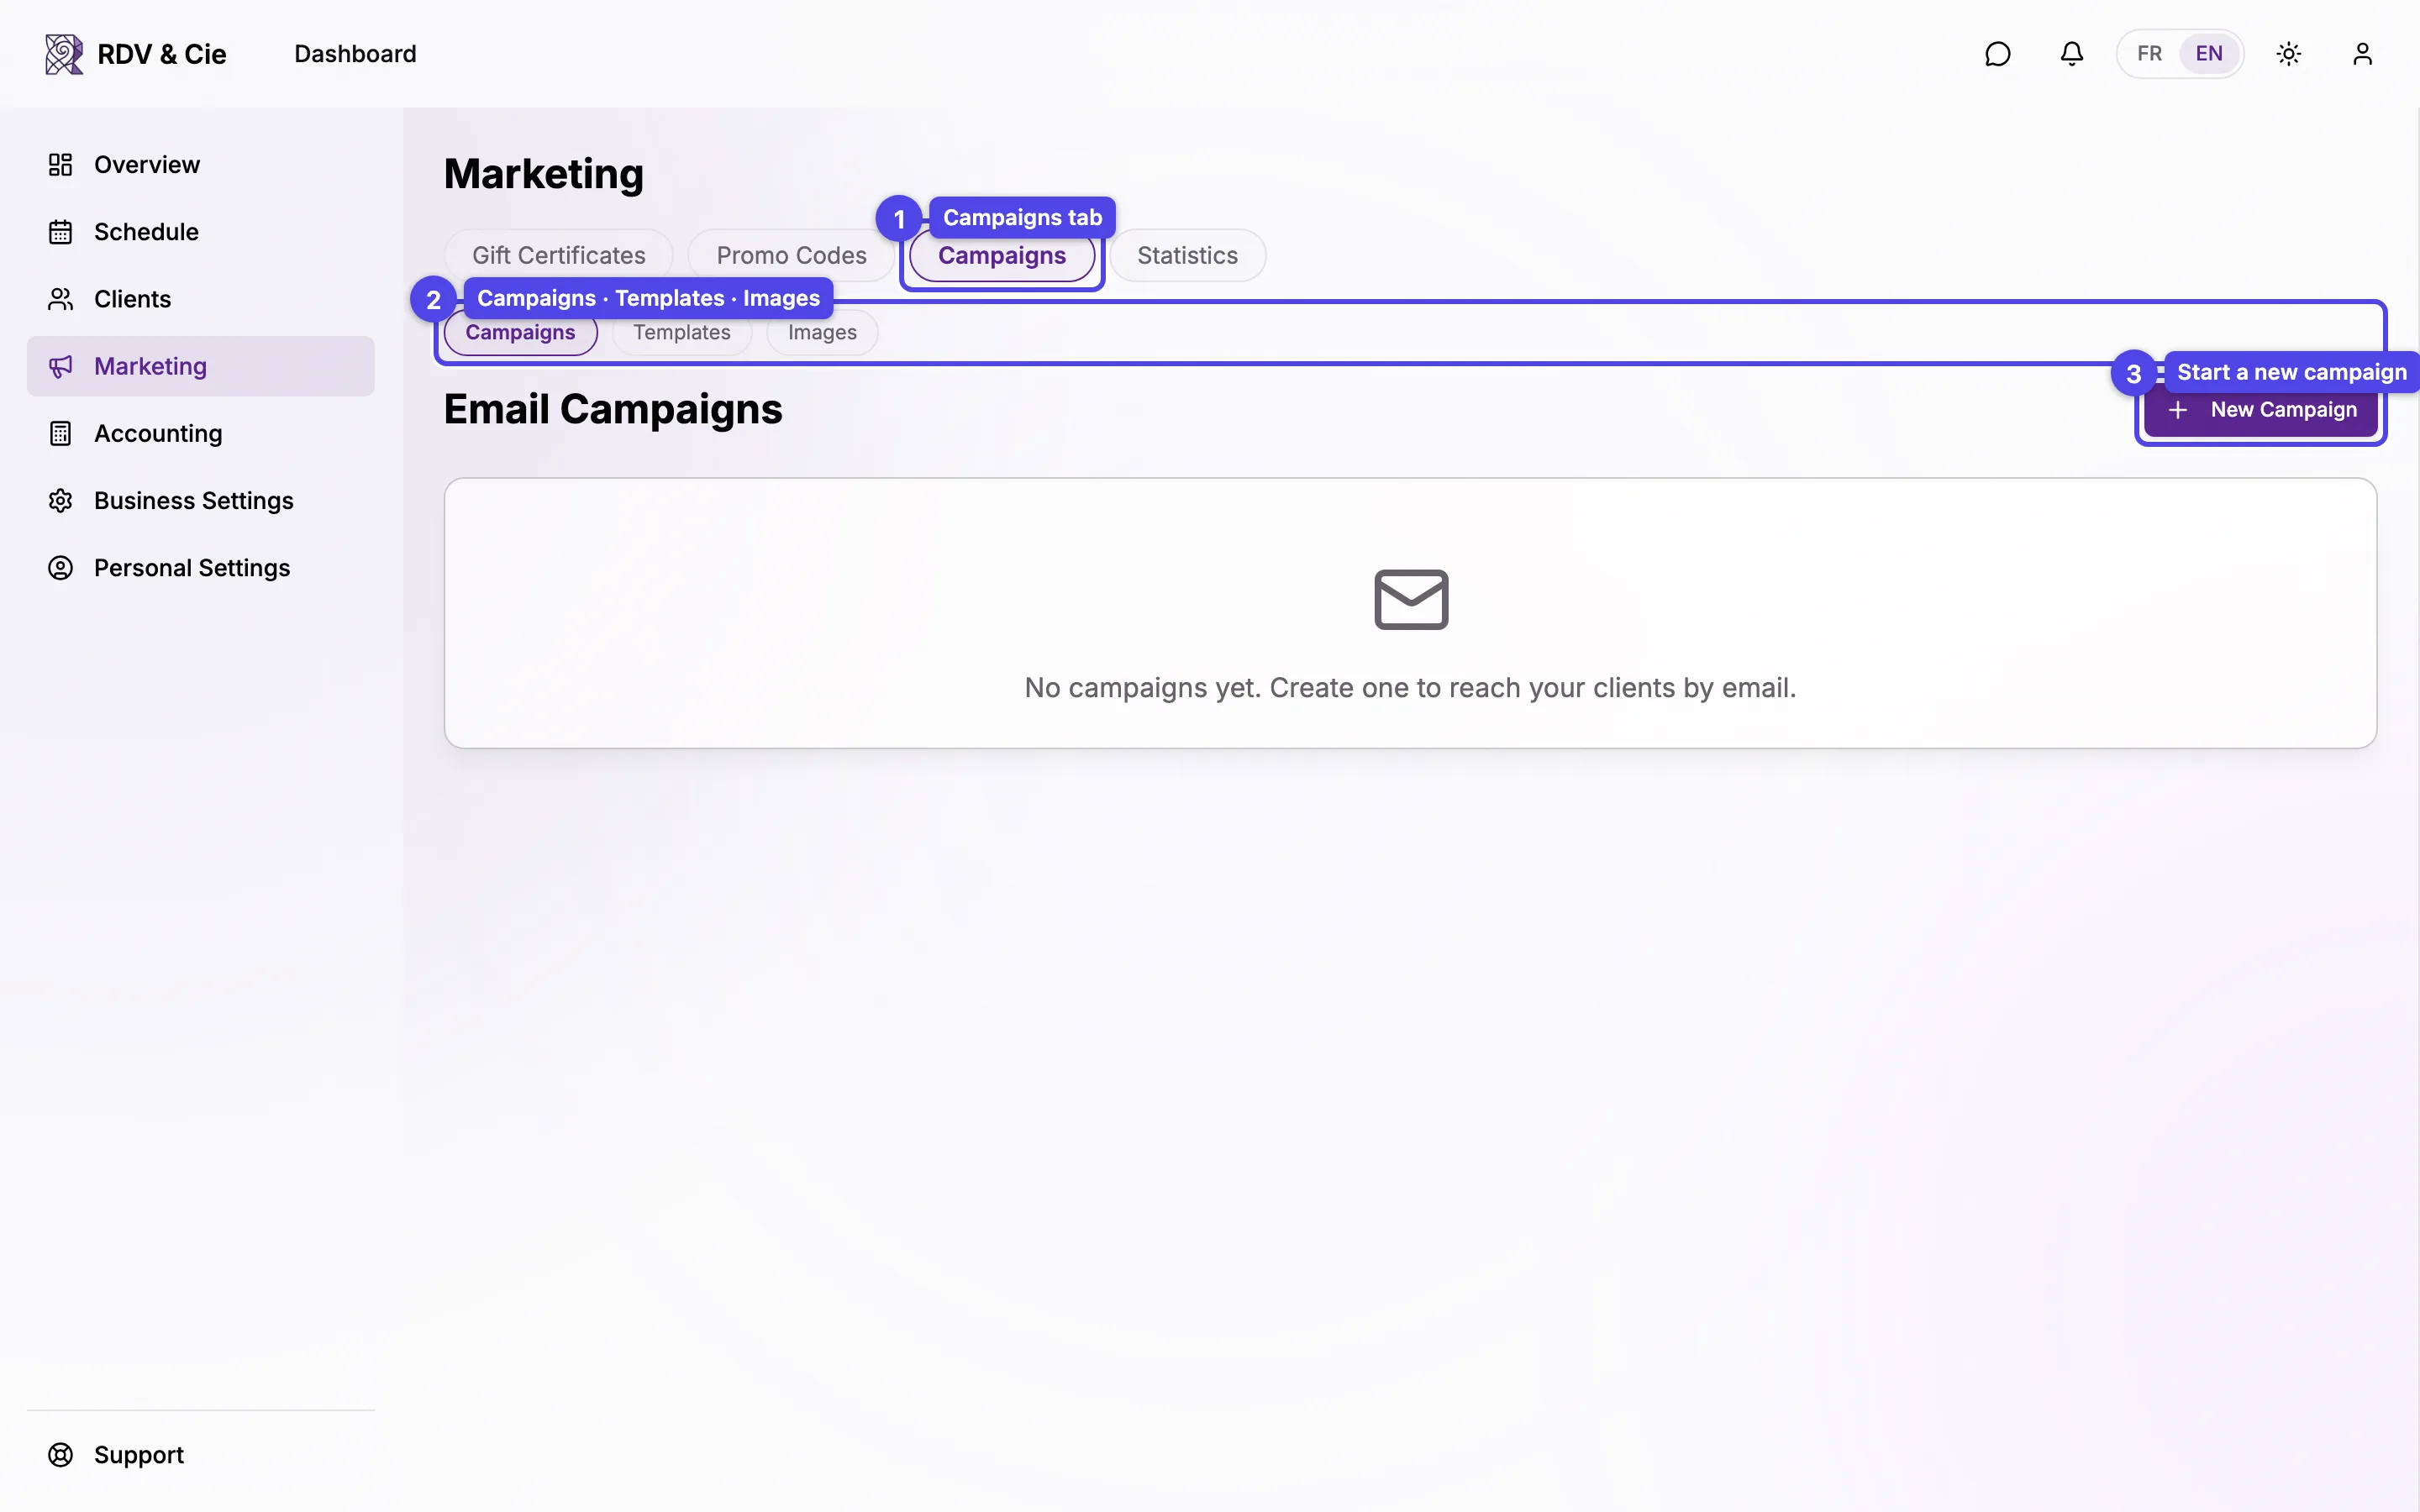
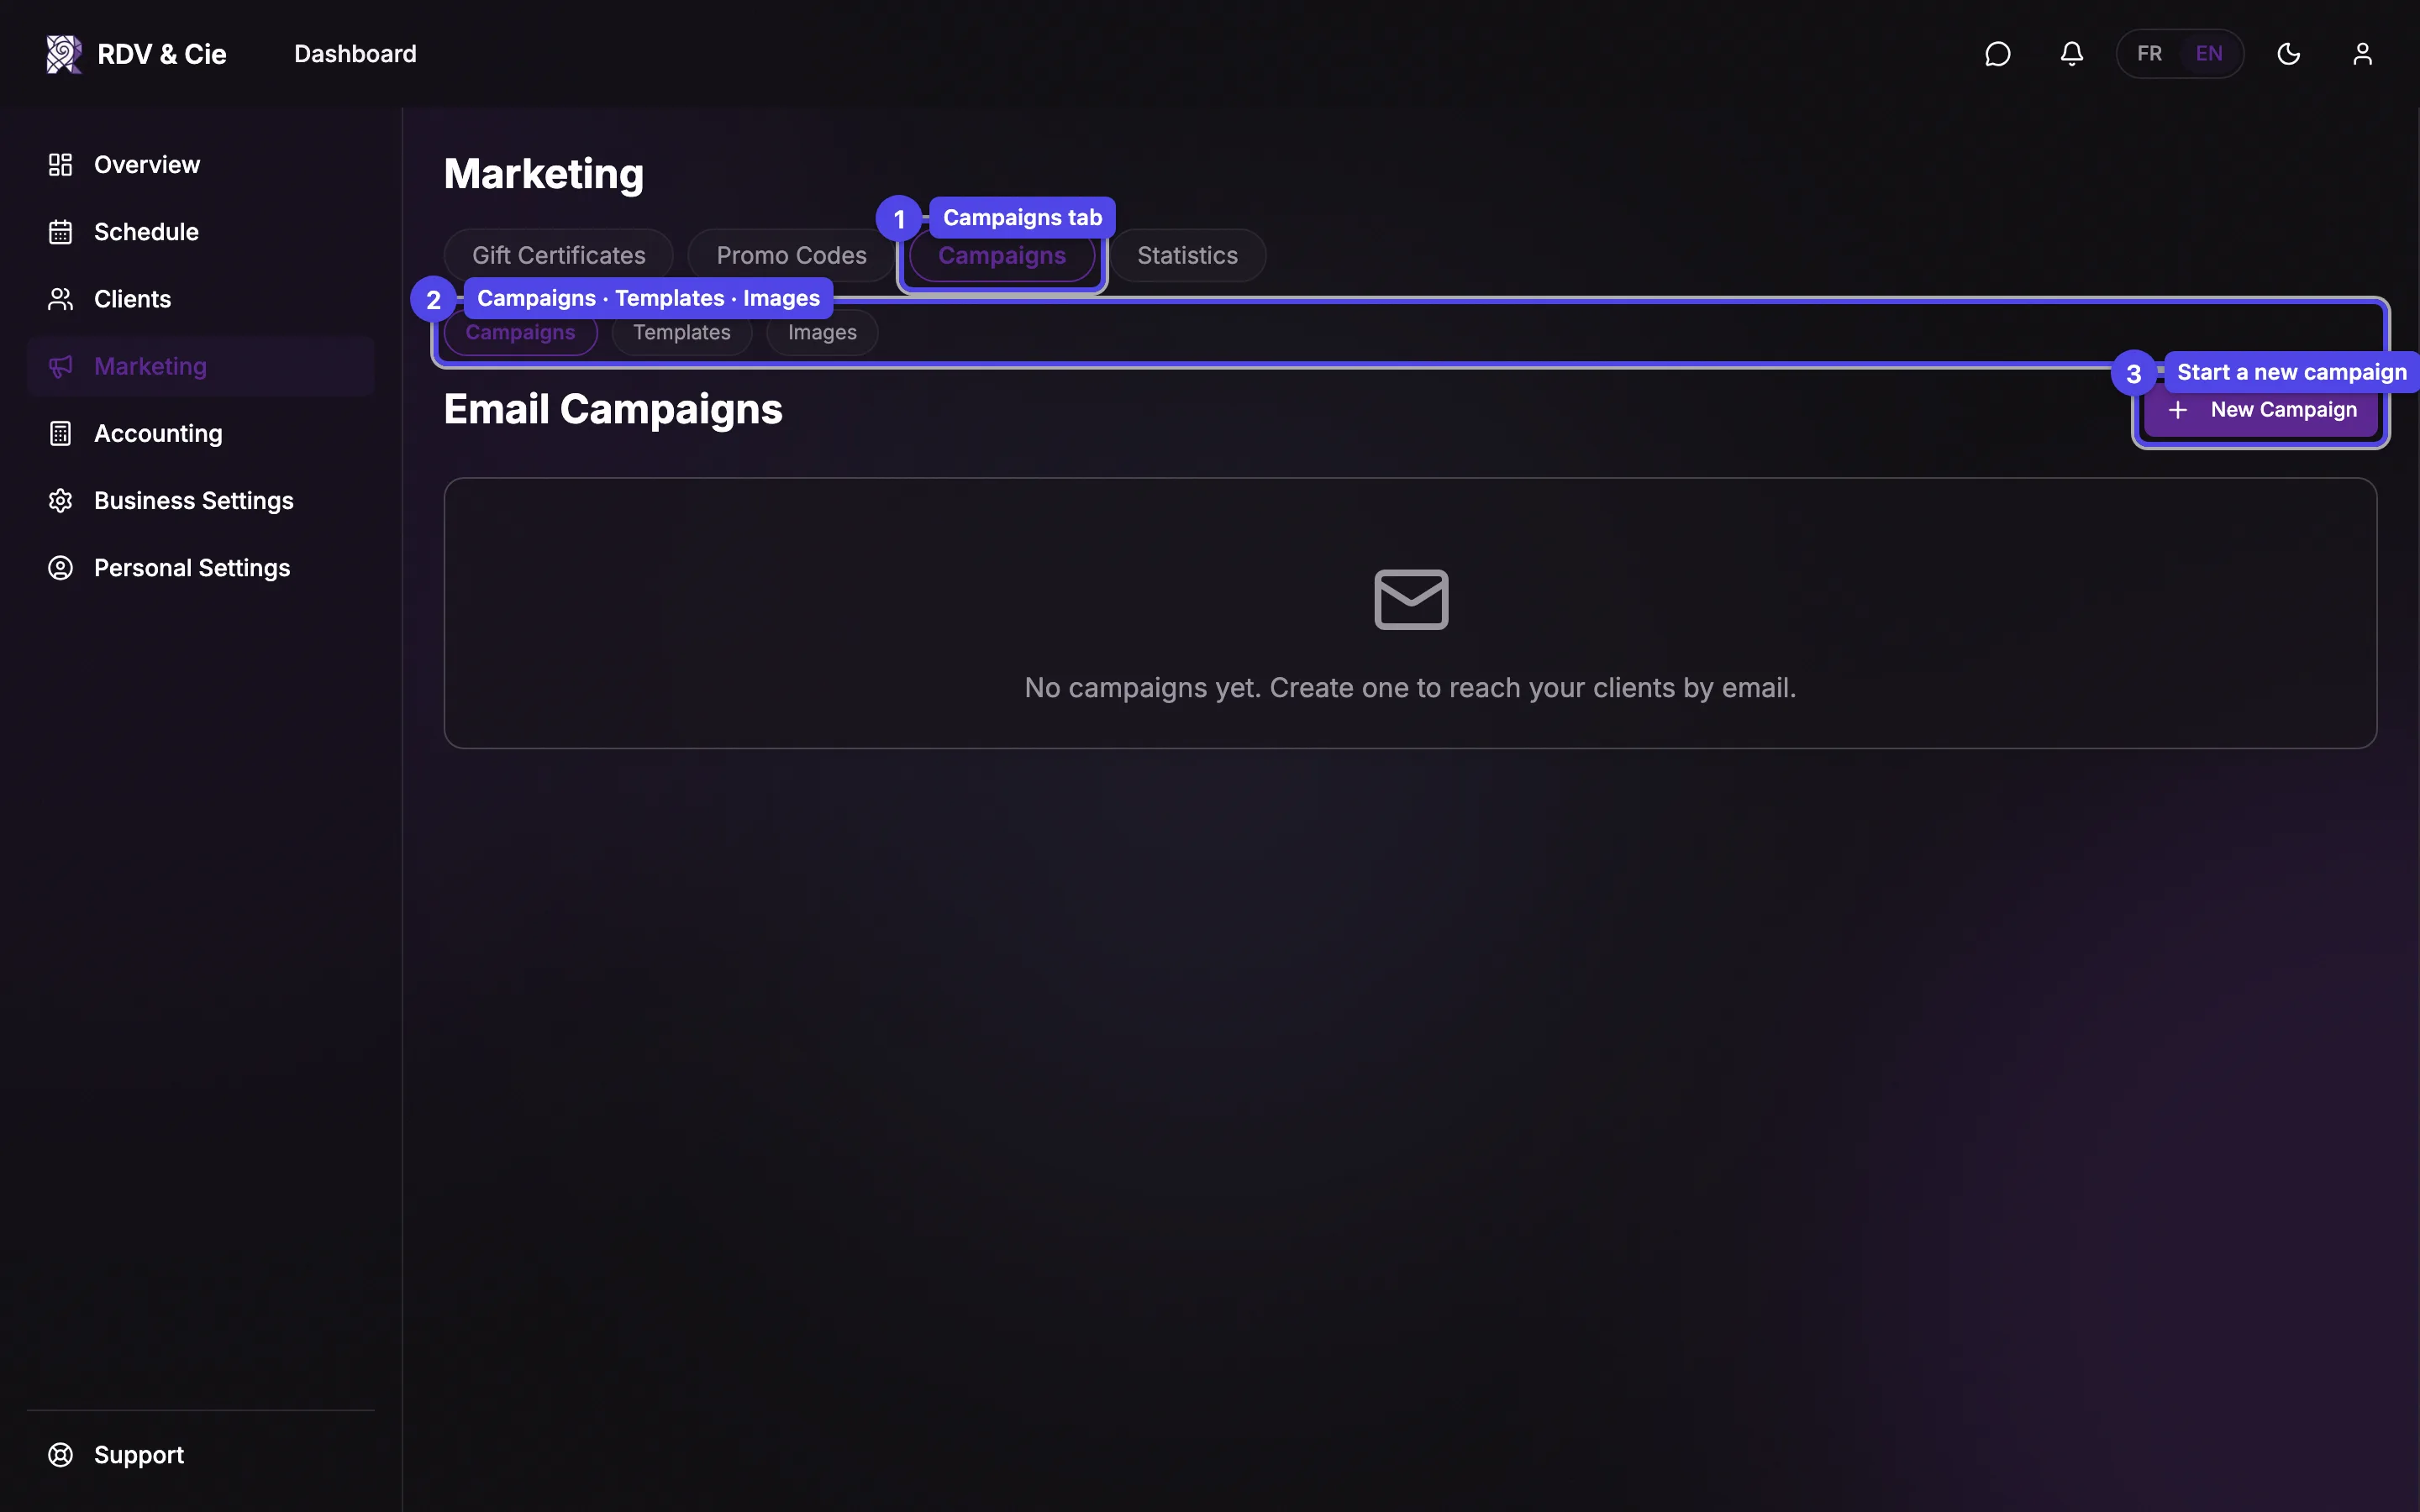
The newsletters list
A sub-nav at the top switches between Newsletters, Templates (reusable designs), and Images (your uploaded gallery). The New newsletter button opens the wizard. An image still used in a newsletter, a template or a scheduled email can't be deleted: the Image in use dialog tells you how many places use it.
Each card shows the newsletter name and a status badge — Draft, Scheduled, Sending, Completed, or Cancelled — plus stats once it's sent (sent, delivered, opens, clicks, bookings). The actions on a card depend on its status:
- View stats — opens the per-recipient breakdown (sending, completed, or scheduled newsletters).
- Copy URL — copies the public hosted-page link.
- Duplicate — on any newsletter, copies the content, the SMS message, and the audience into a new draft and opens it in the wizard. Handy for resending a past newsletter to a different list — pick the new audience in step 3.
- Edit / Delete — on drafts only.
- Cancel — stops a scheduled newsletter before it sends.
The four-step wizard
The wizard walks you through four steps shown in the stepper at the top.
Step 1 — Template
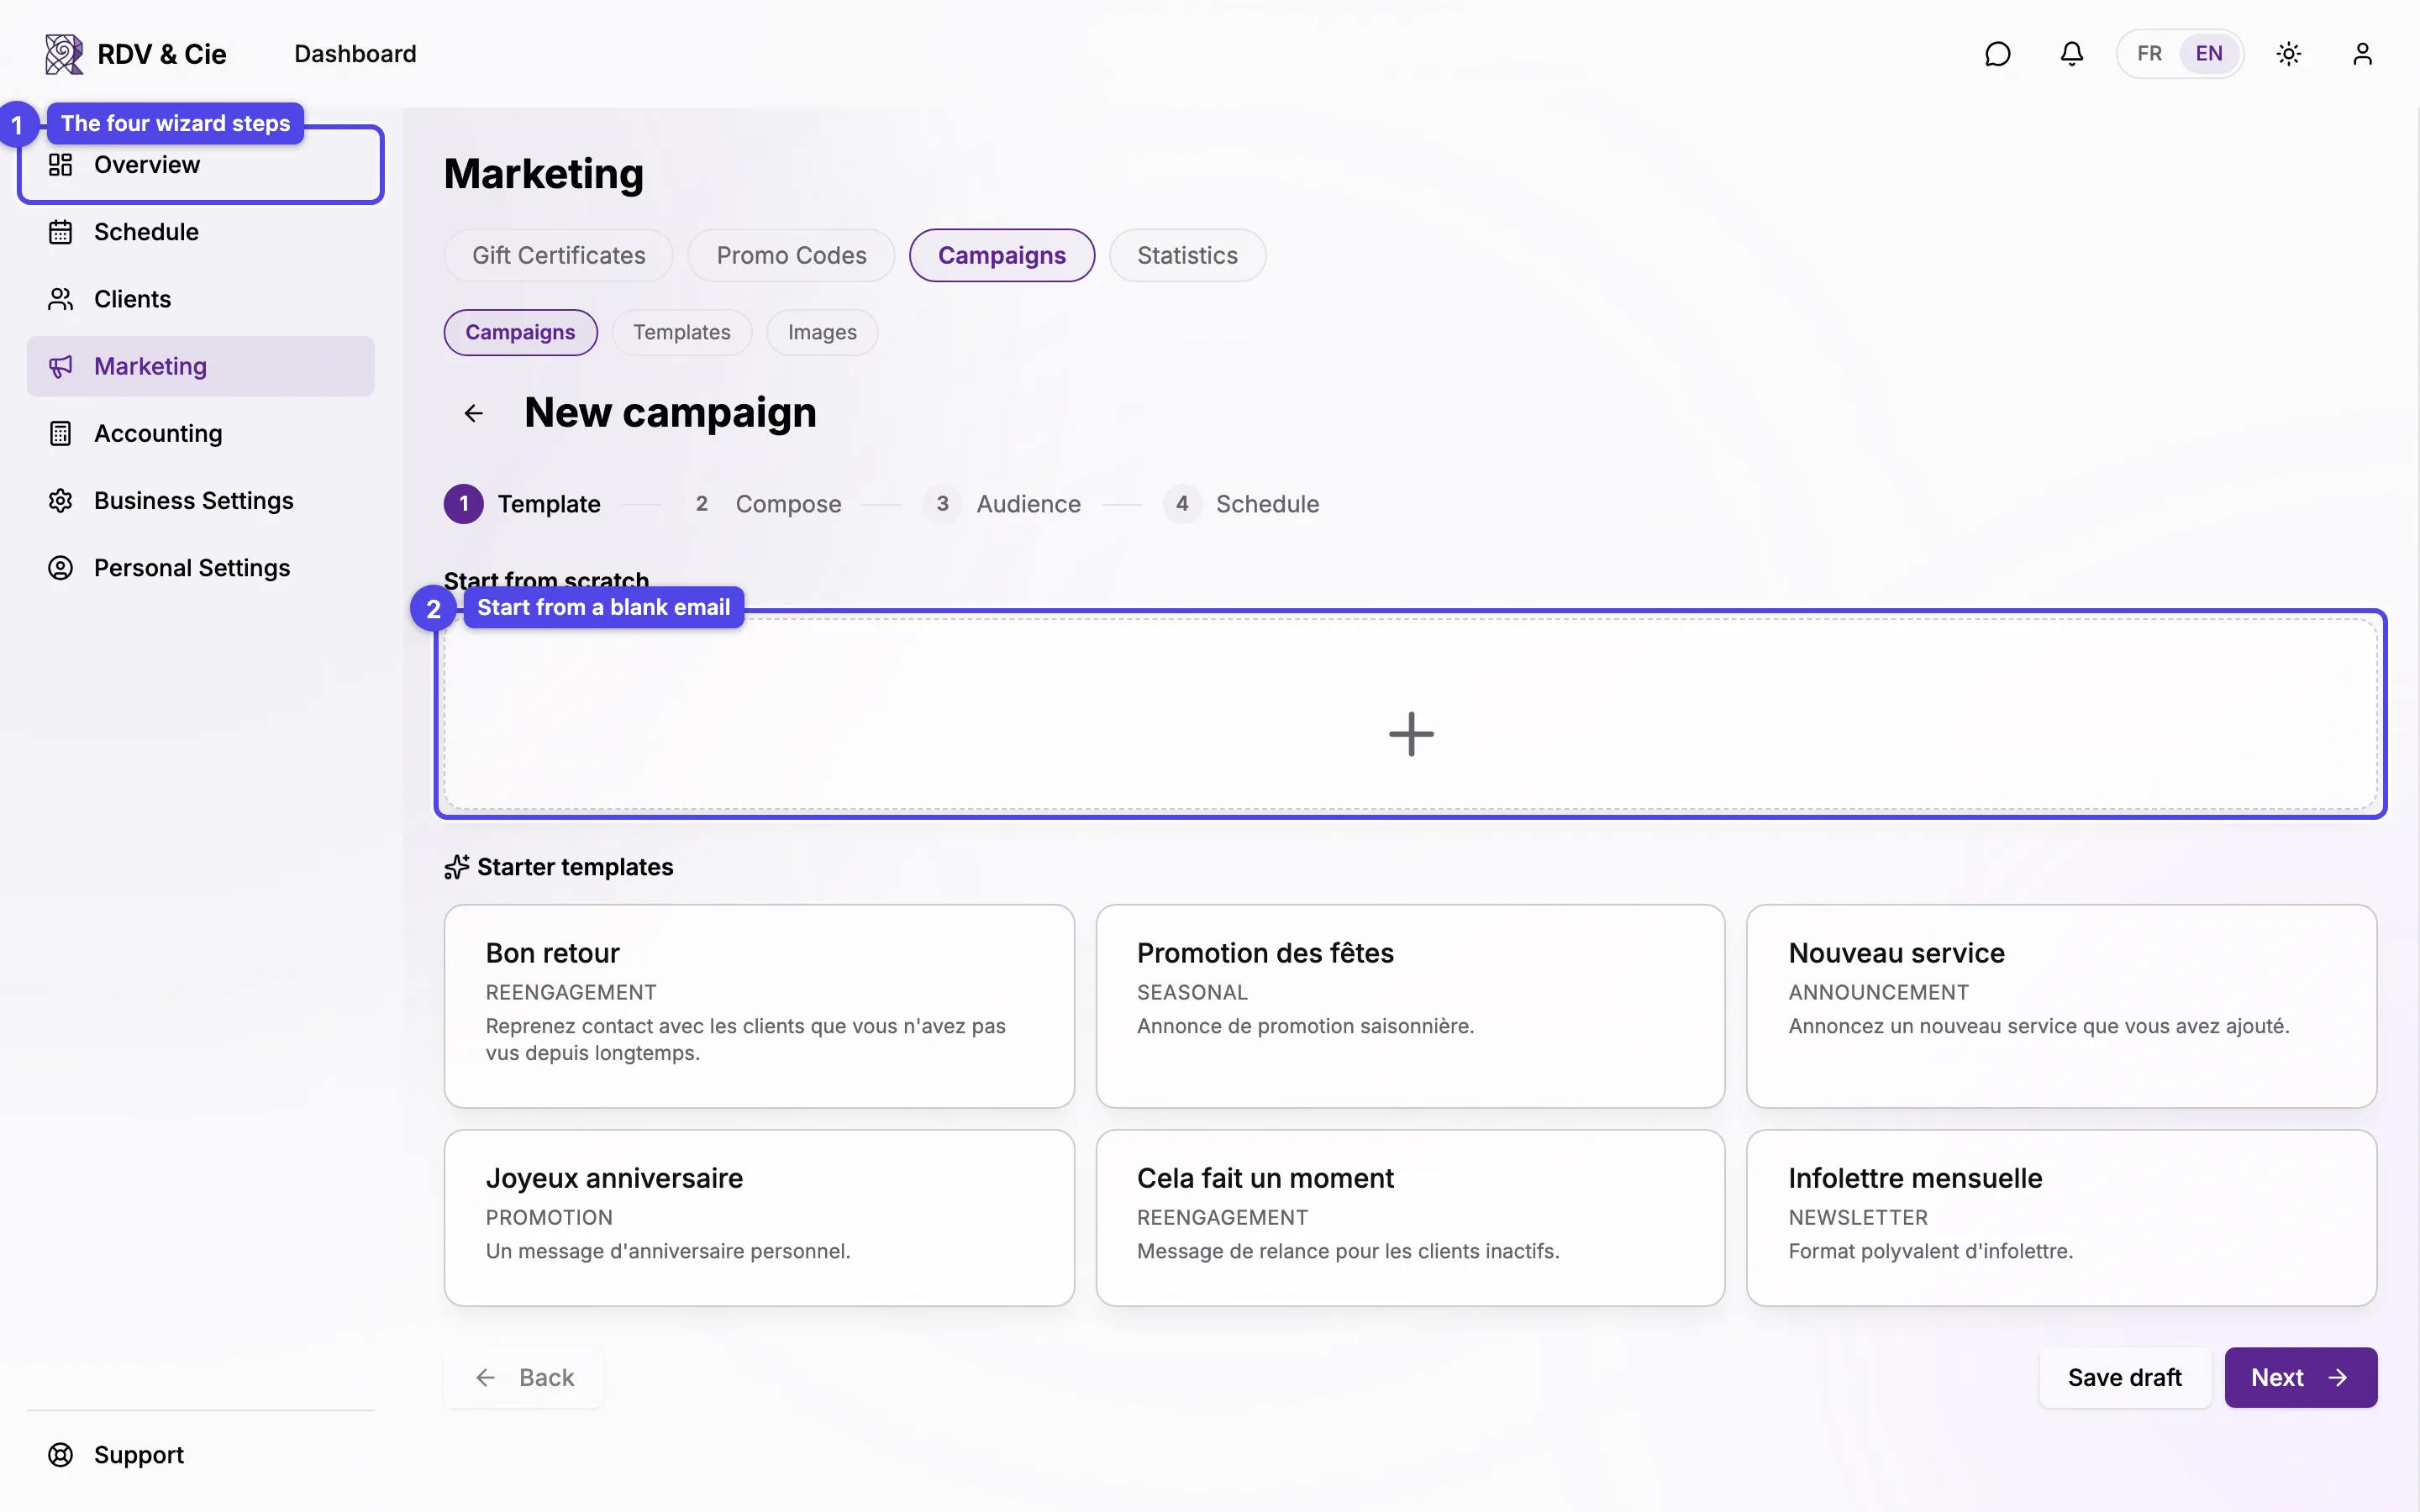
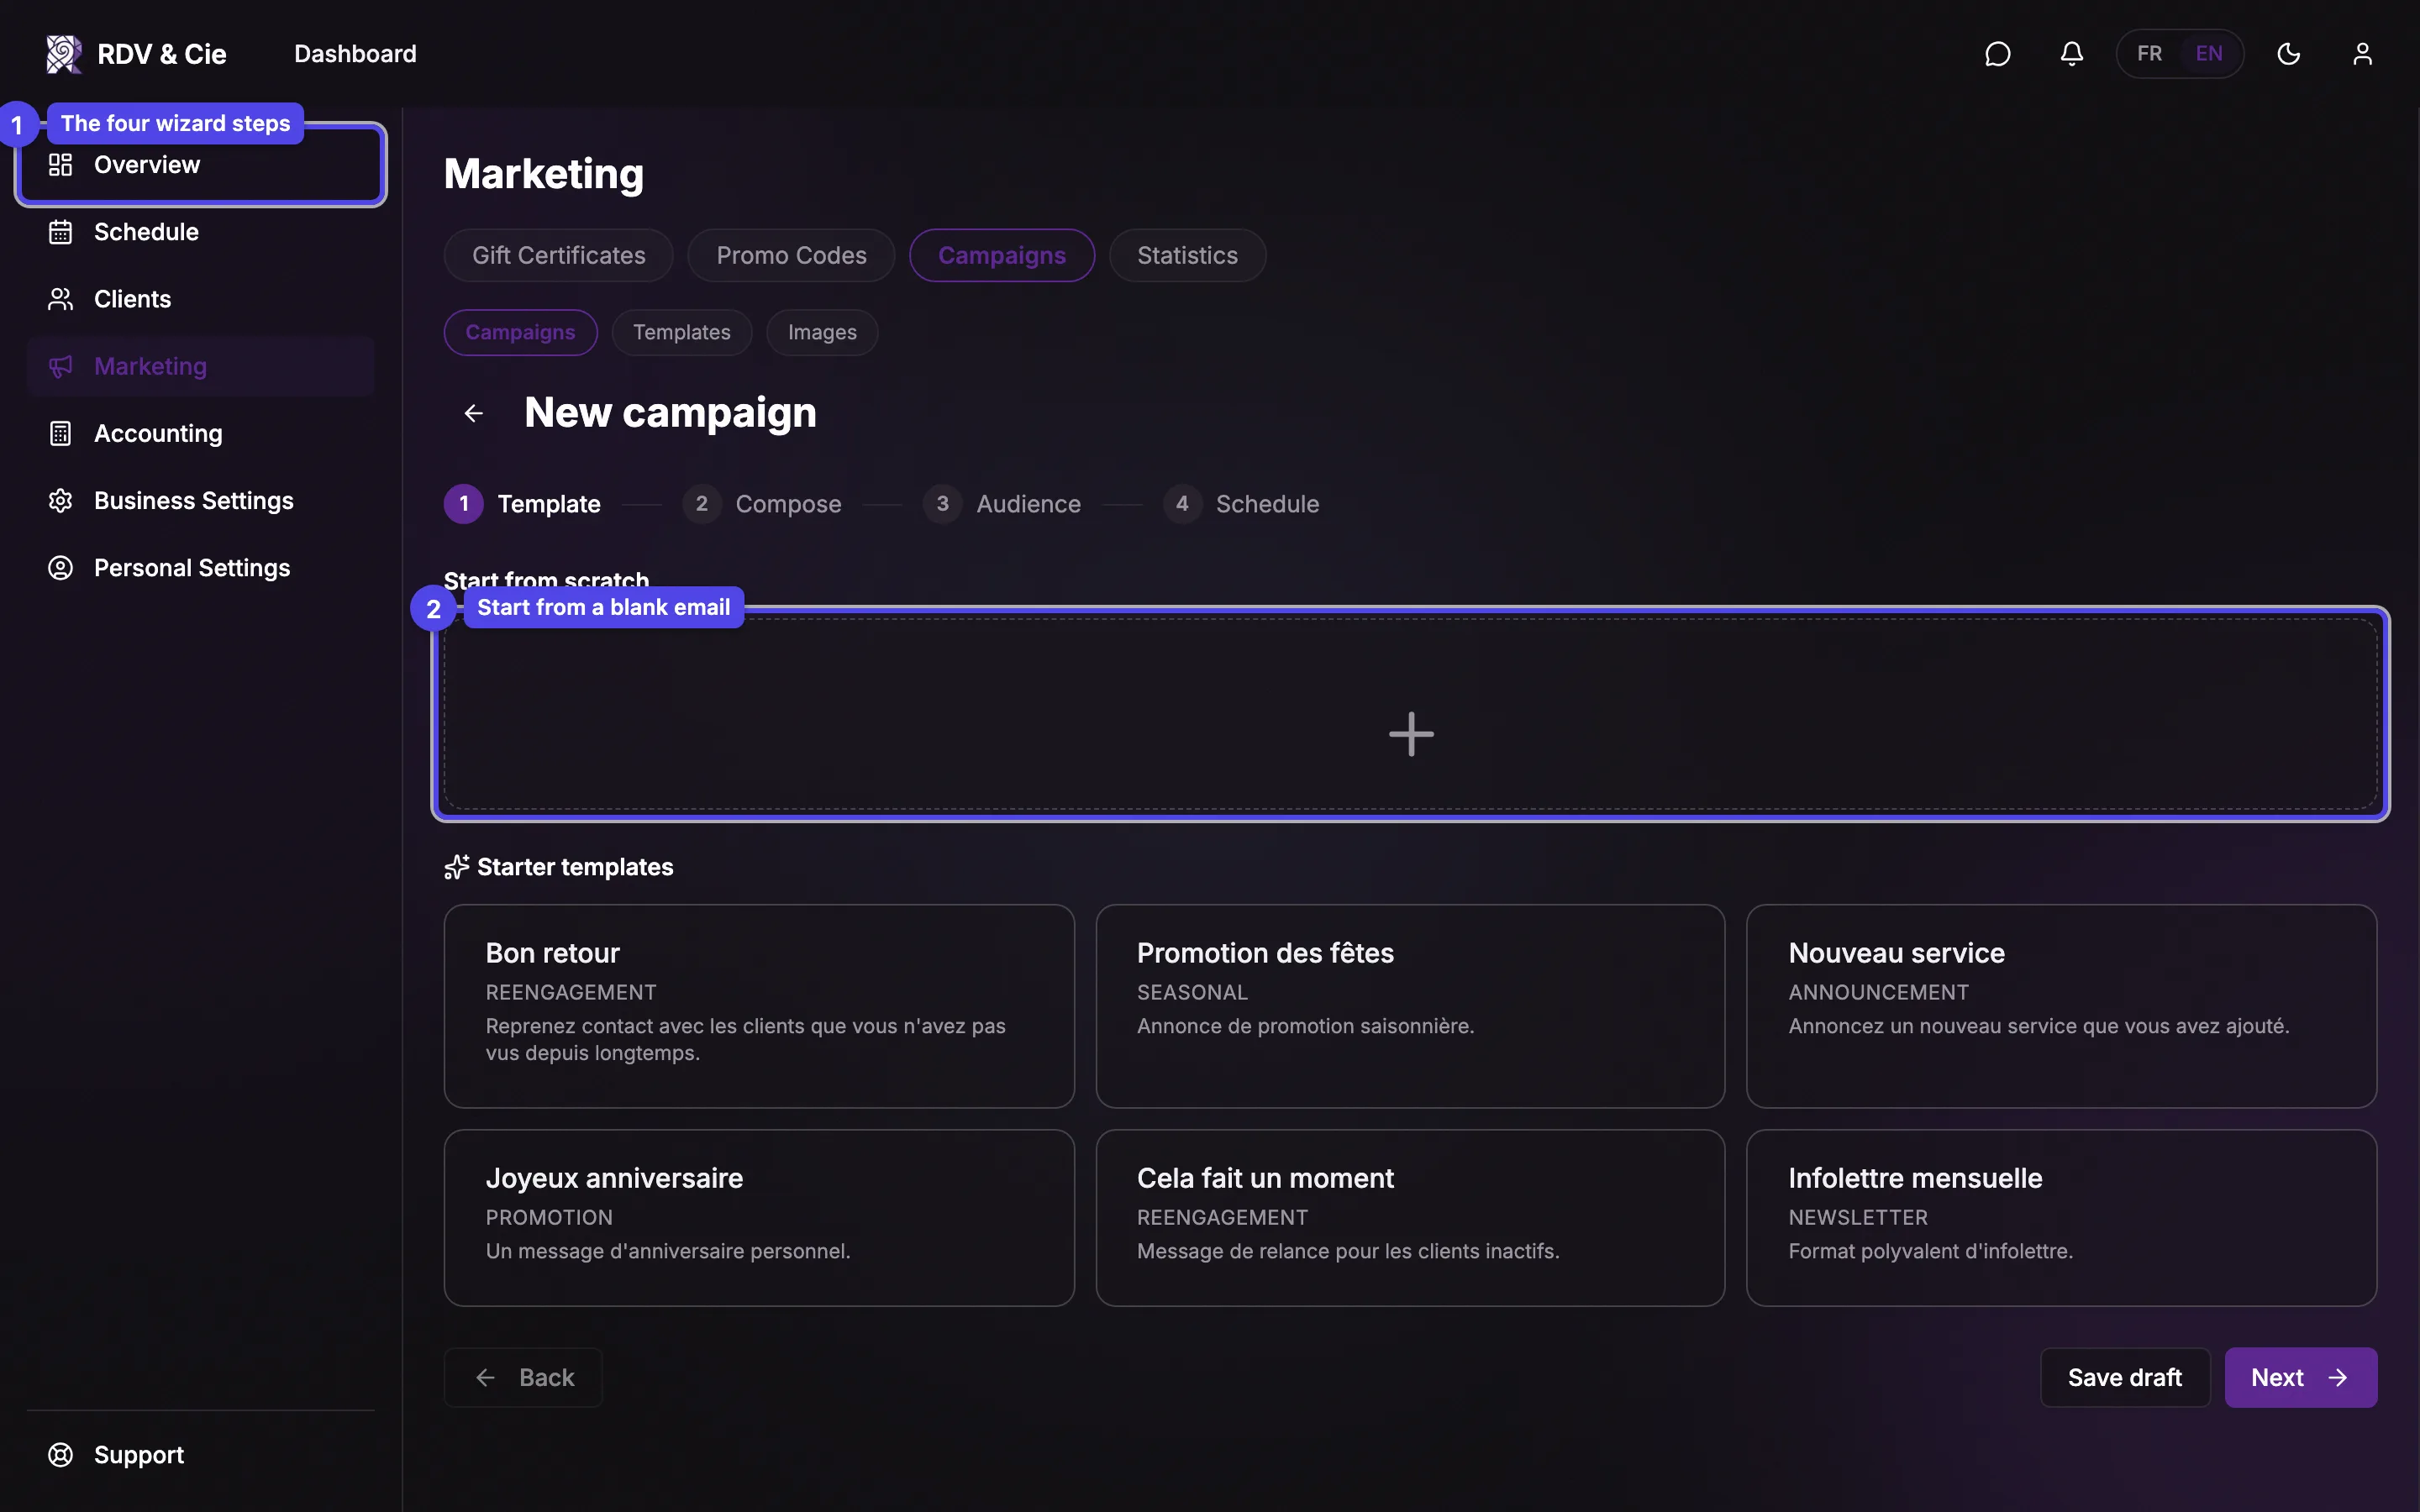
Start from a blank email, reuse one of your templates, or pick a bilingual starter template. Picking any option creates the draft and moves you to Compose.
Step 2 — Compose
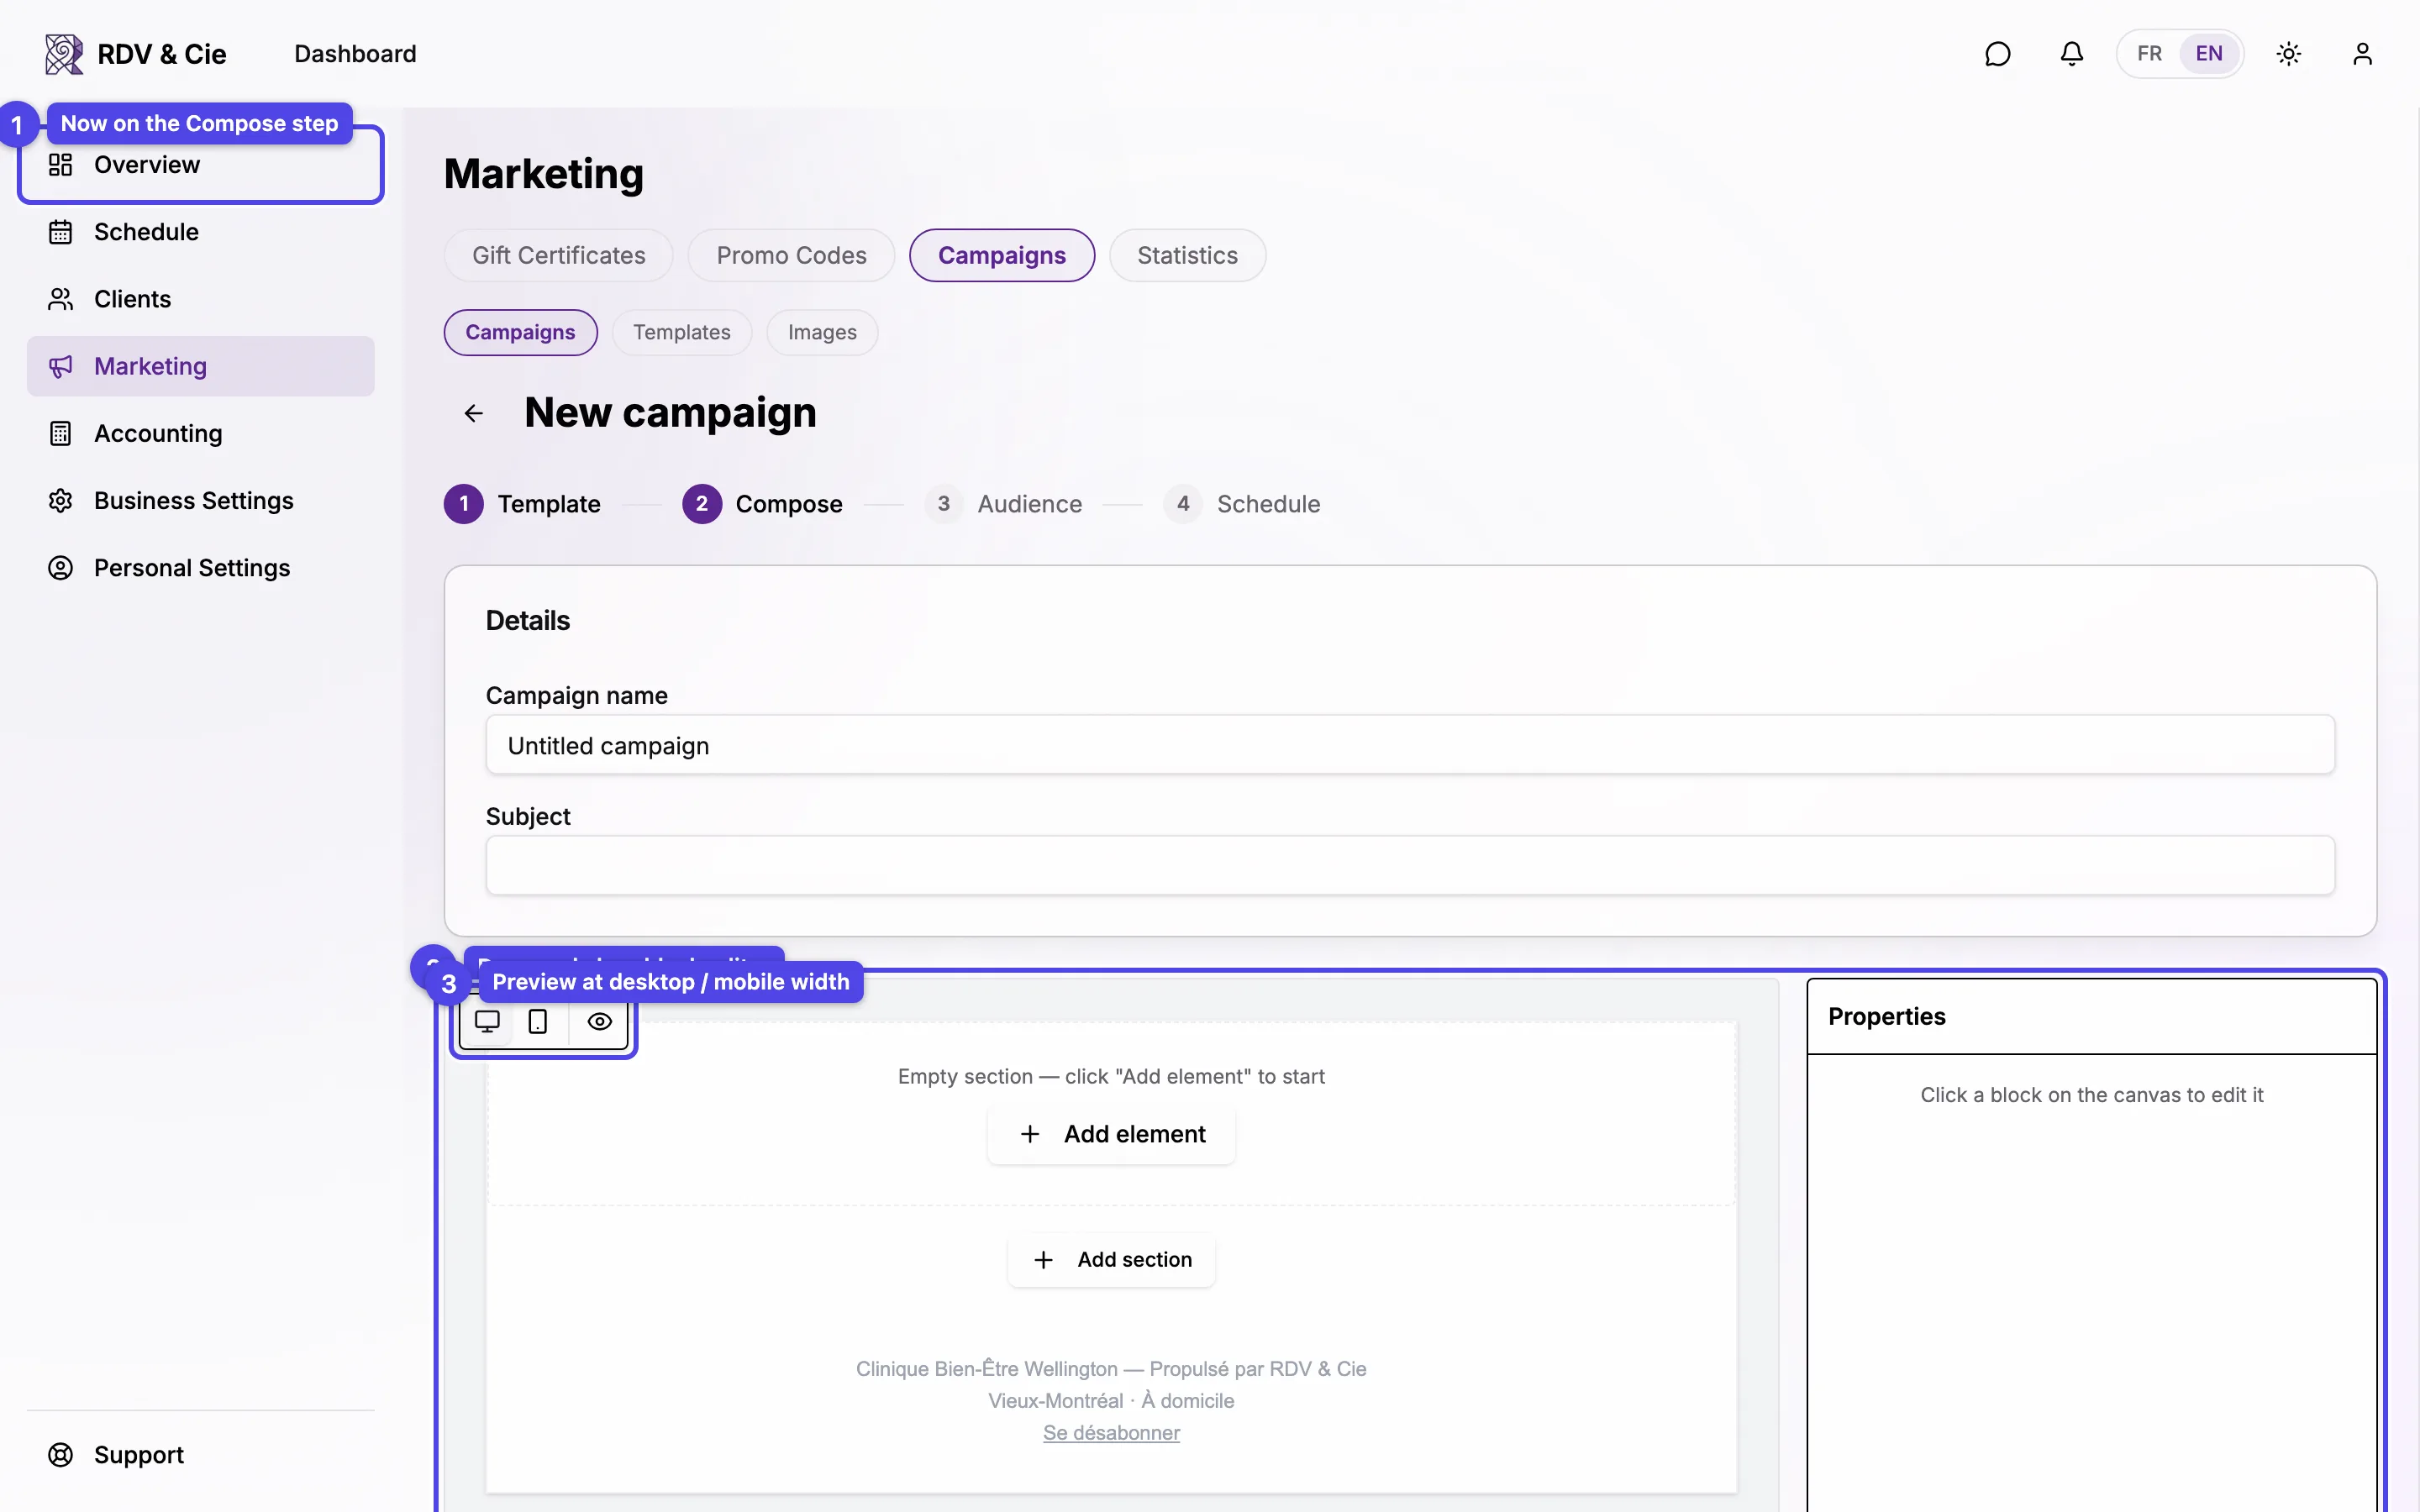
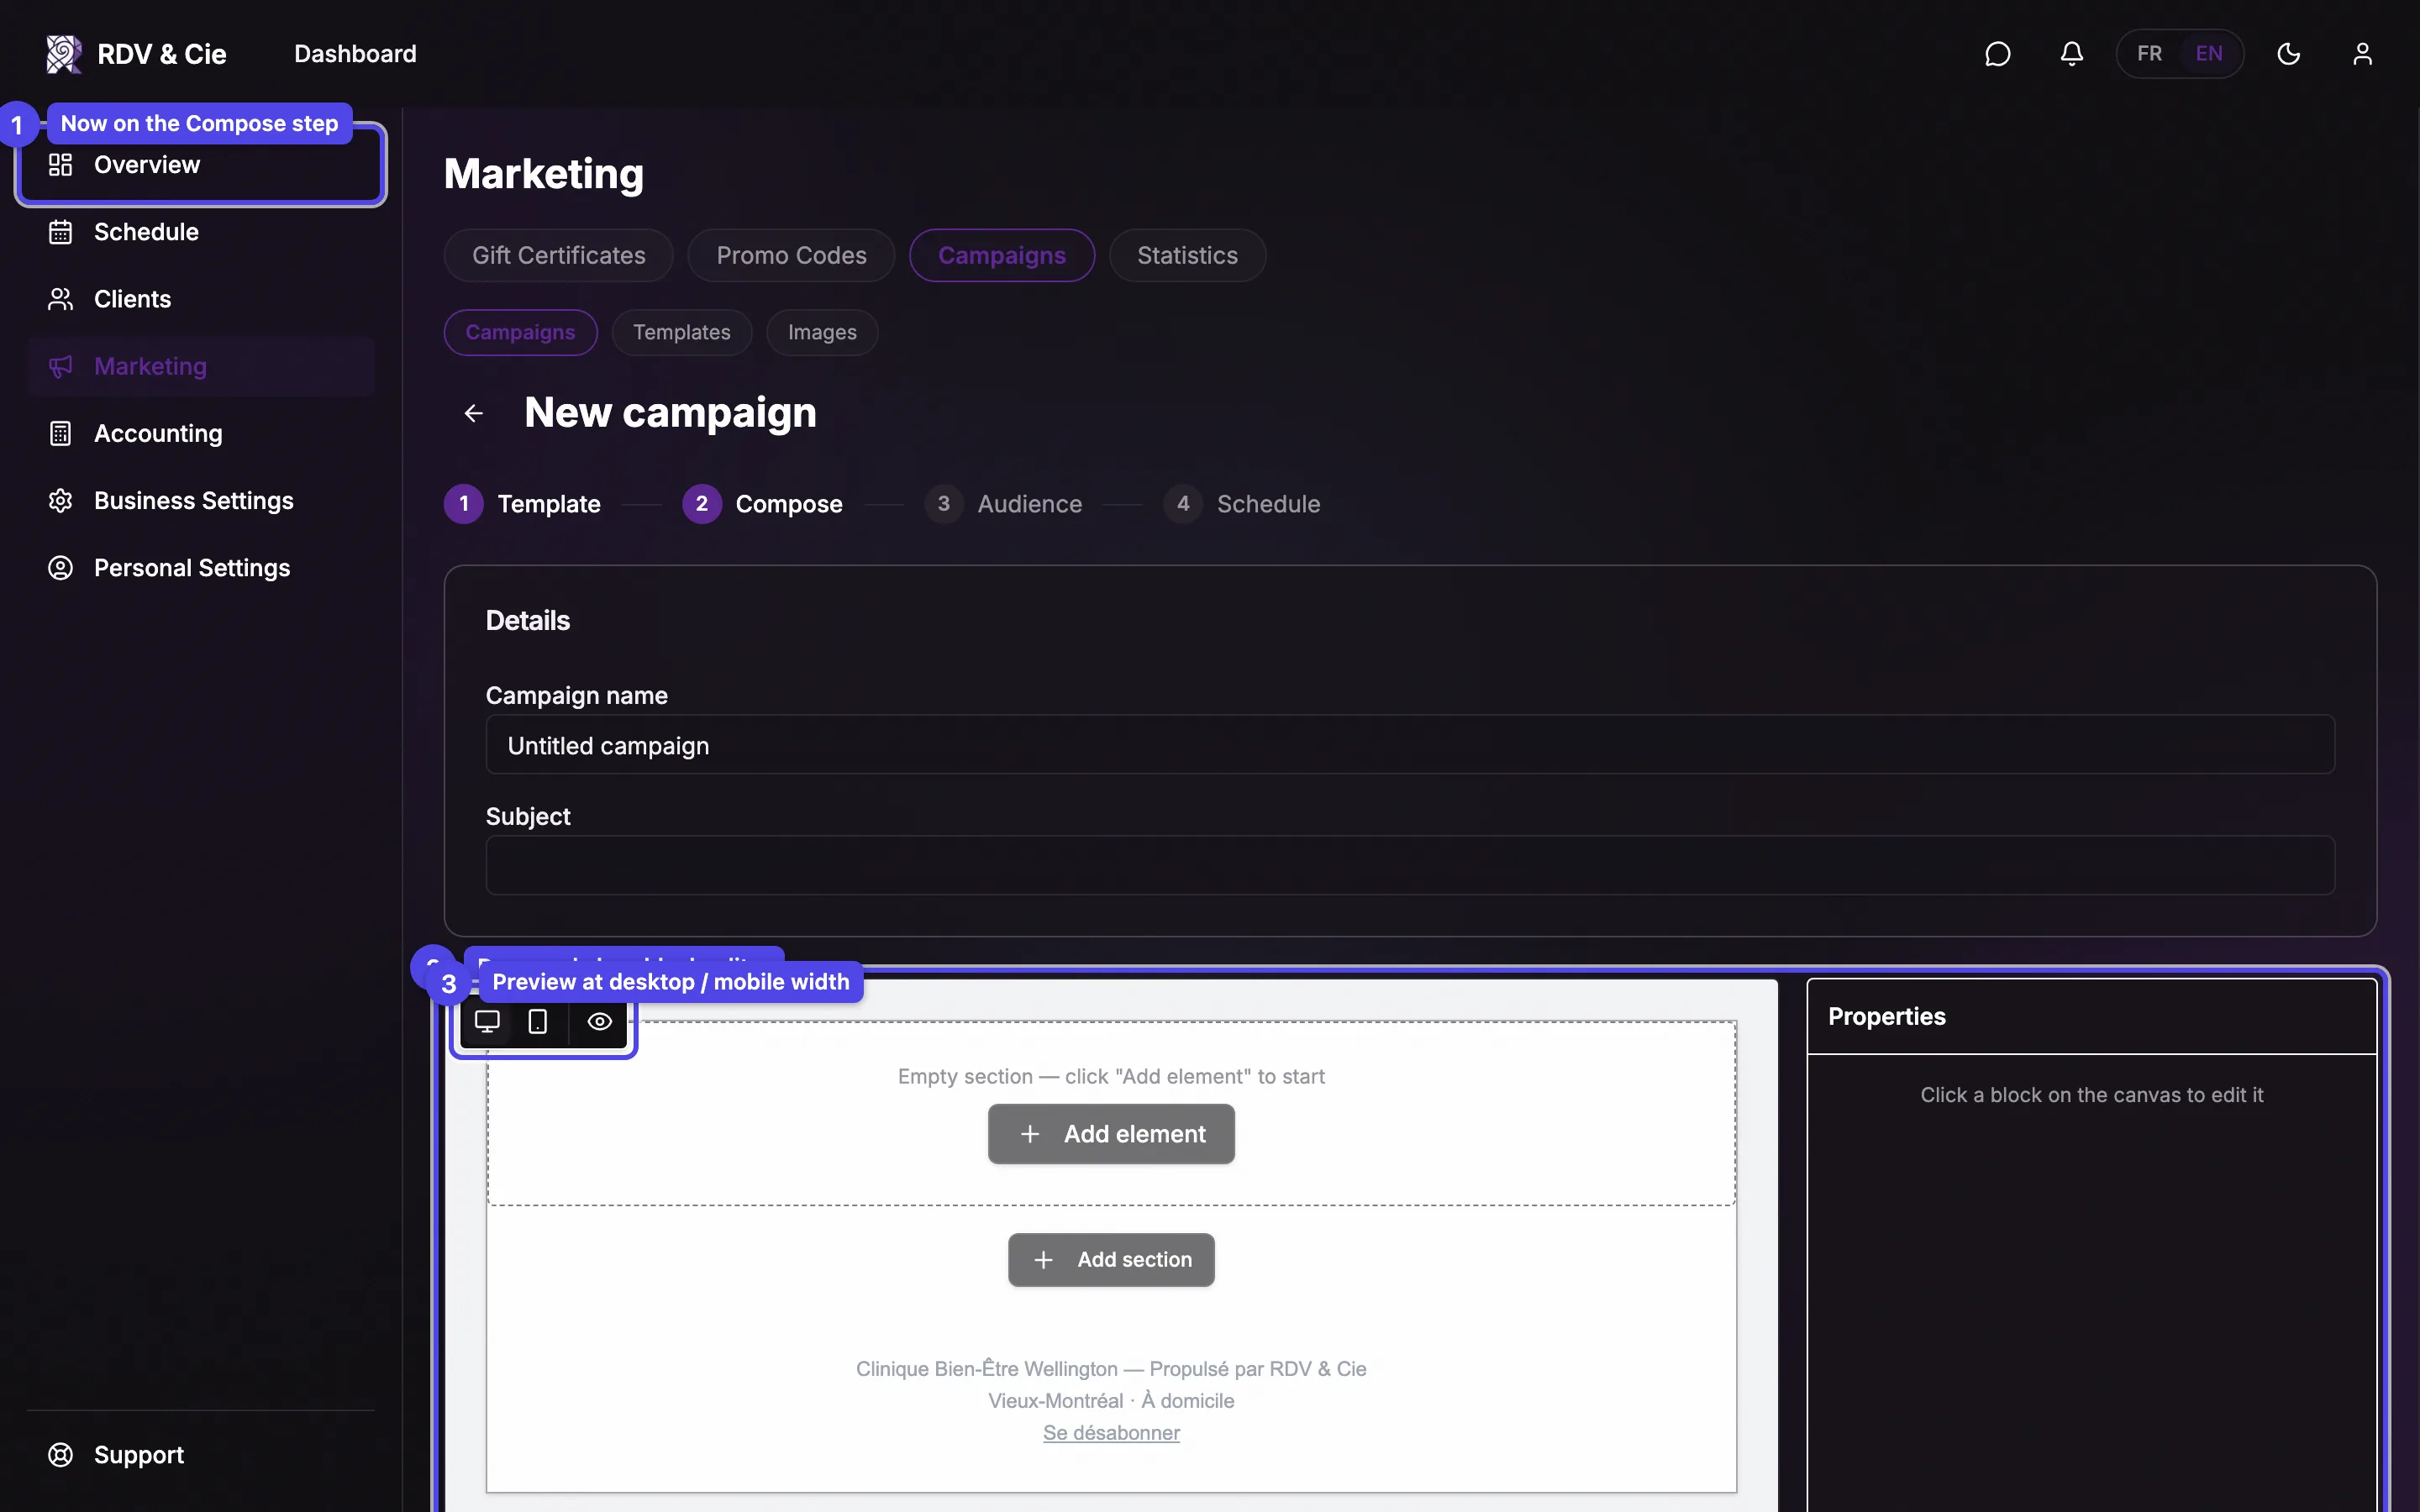
Set the Newsletter name (internal) and email Subject, then build the email in the block editor:
Add blocks
Insert sections, then drop in headings, paragraphs, images, buttons, dividers, spacers, social rows, columns, or raw HTML.
Edit a block
Select a block to open the properties panel on the right — colors, spacing, alignment, links, and more.
Preview
The toolbar in the canvas switches between desktop and mobile width and toggles a read-only preview of what recipients see.
Below the editor, three buttons let you Save as template, Preview page (opens the public hosted version in a new tab), and Send test (emails the draft to your own account's address — it must be confirmed — at most 10 times an hour, sent under your business's name).
Add an SMS
When the SMS channel is available, an SMS card appears under the editor.
Tick Also send by SMS and write a short message (up to 320 characters). The
variable chips — client name, business name, newsletter link — insert
placeholders, and a phone mock-up previews the result. A tracked link to the
hosted page is appended automatically, followed by a short opt-out line
(Reply STOP to unsubscribe.) added to every newsletter SMS to comply with
anti-spam rules — you'll see both in the preview. Tick Skip email recipients
to text only the people who won't get the email.
Step 3 — Audience
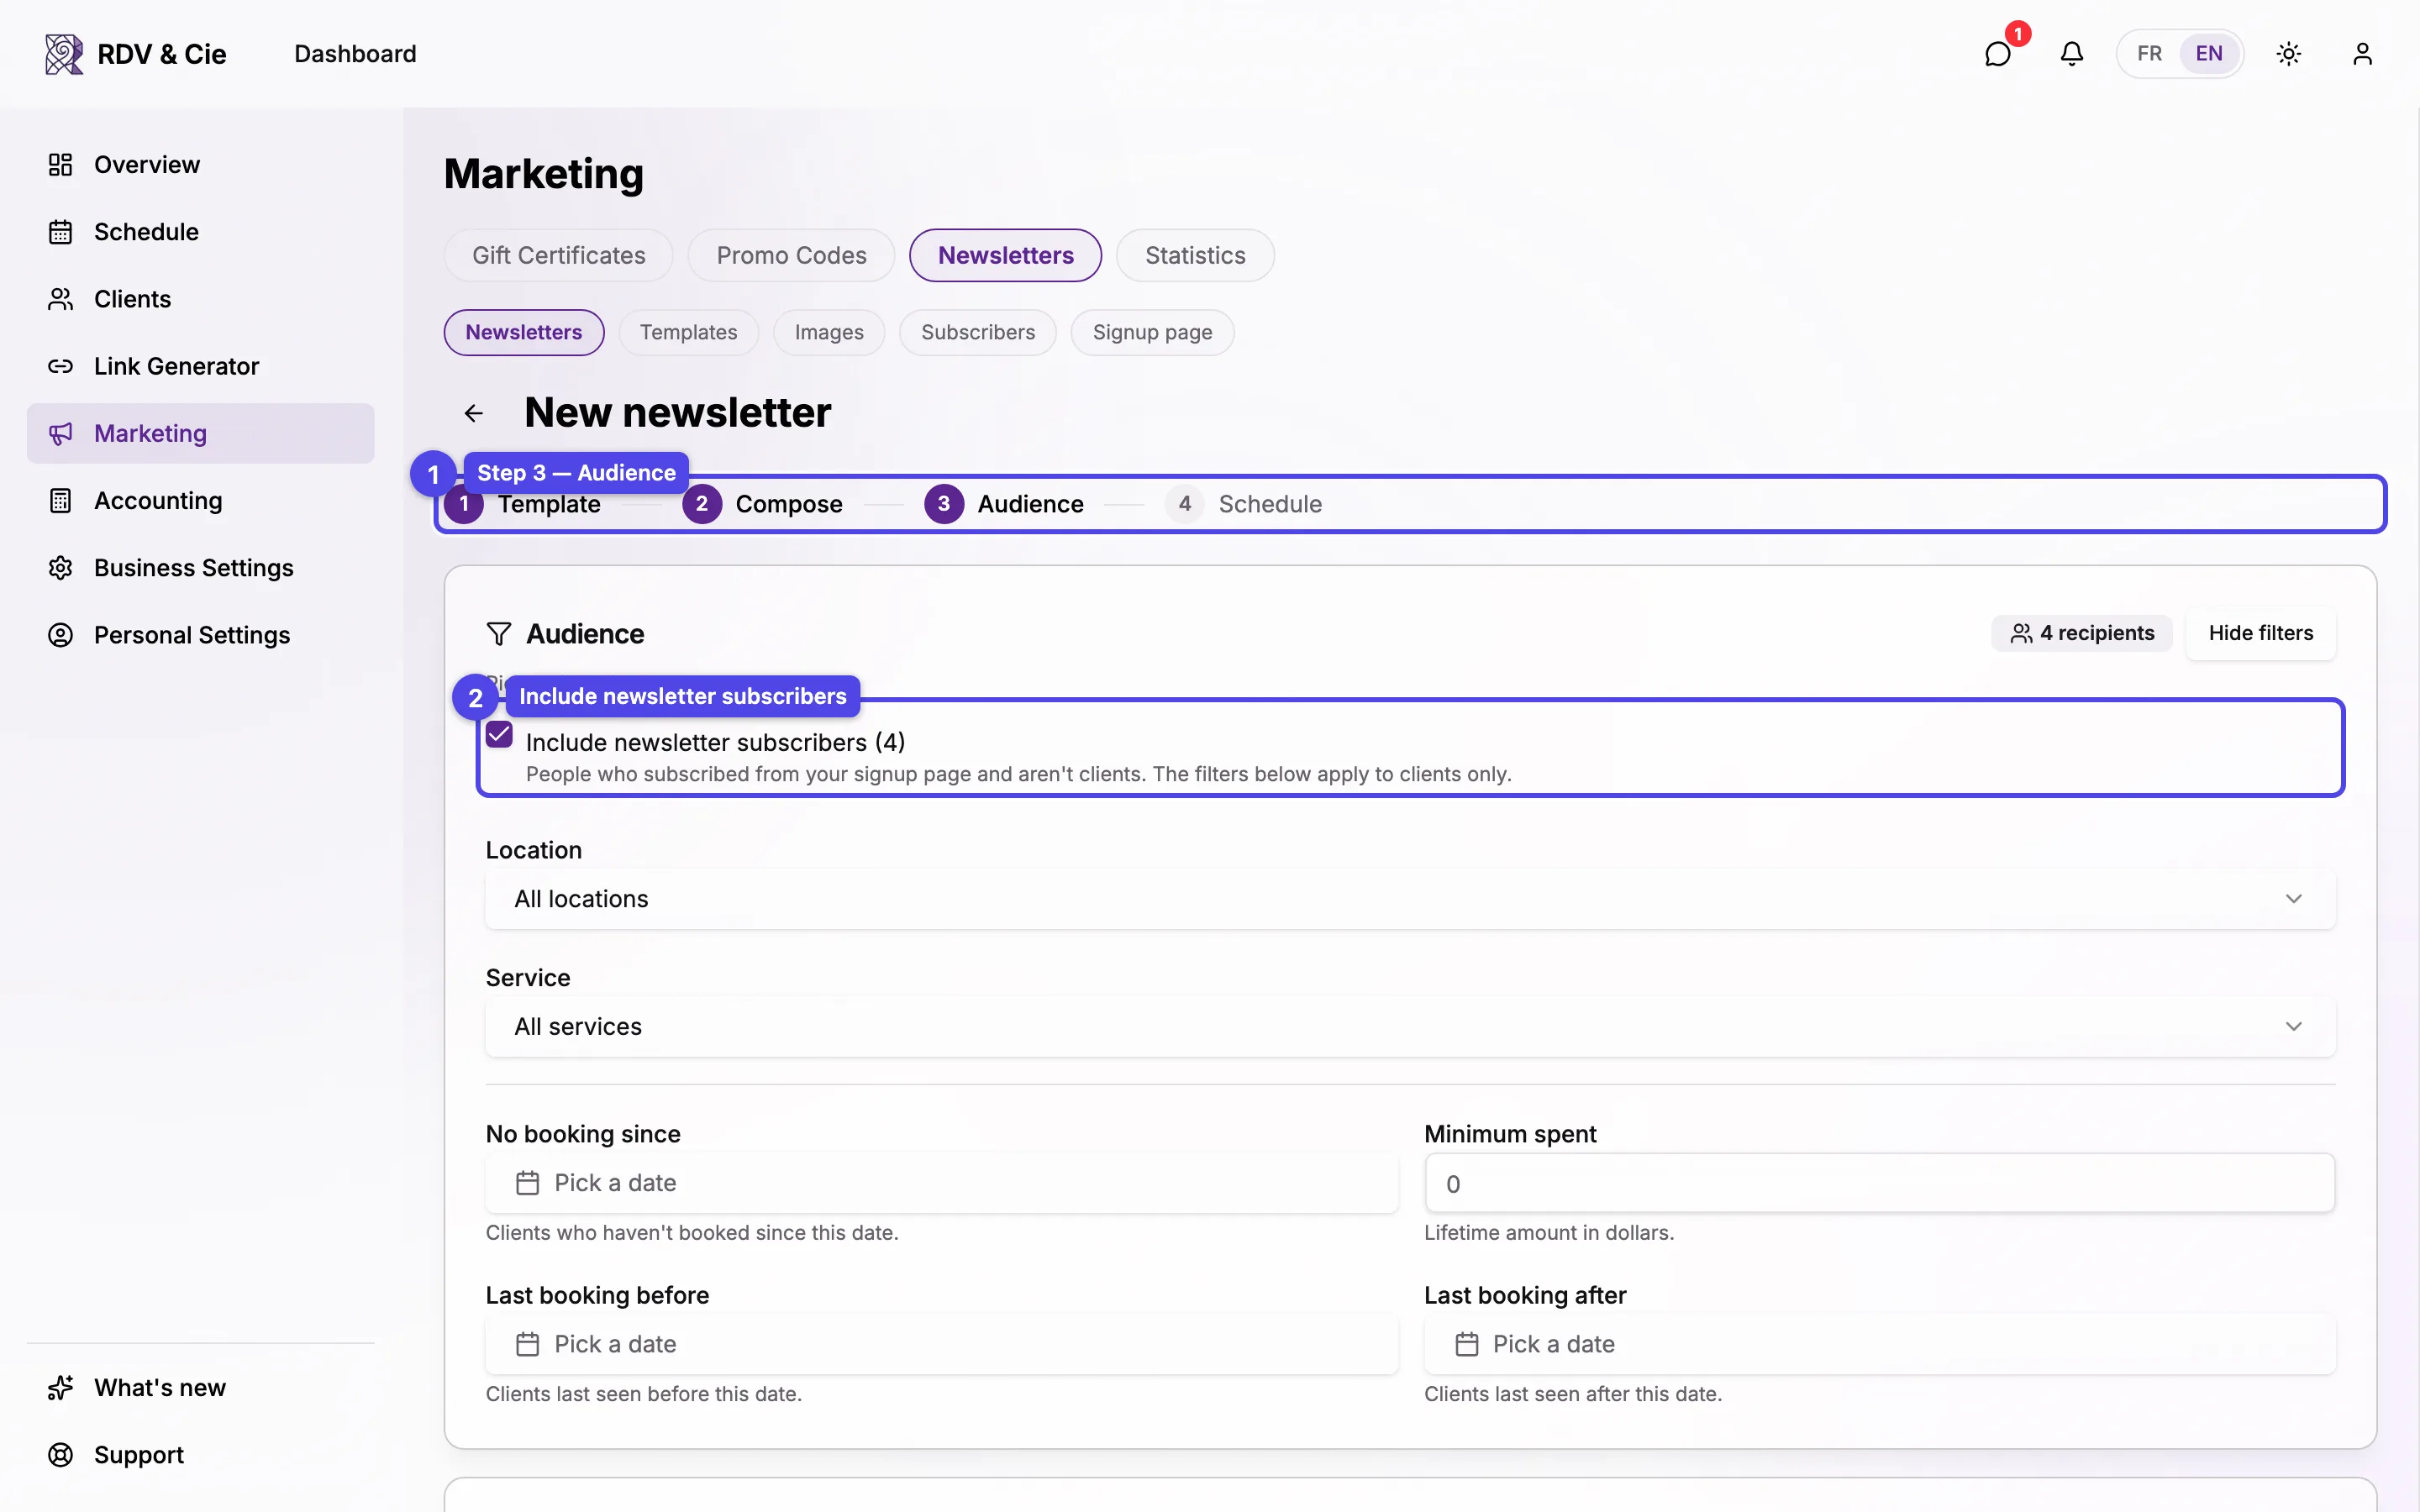
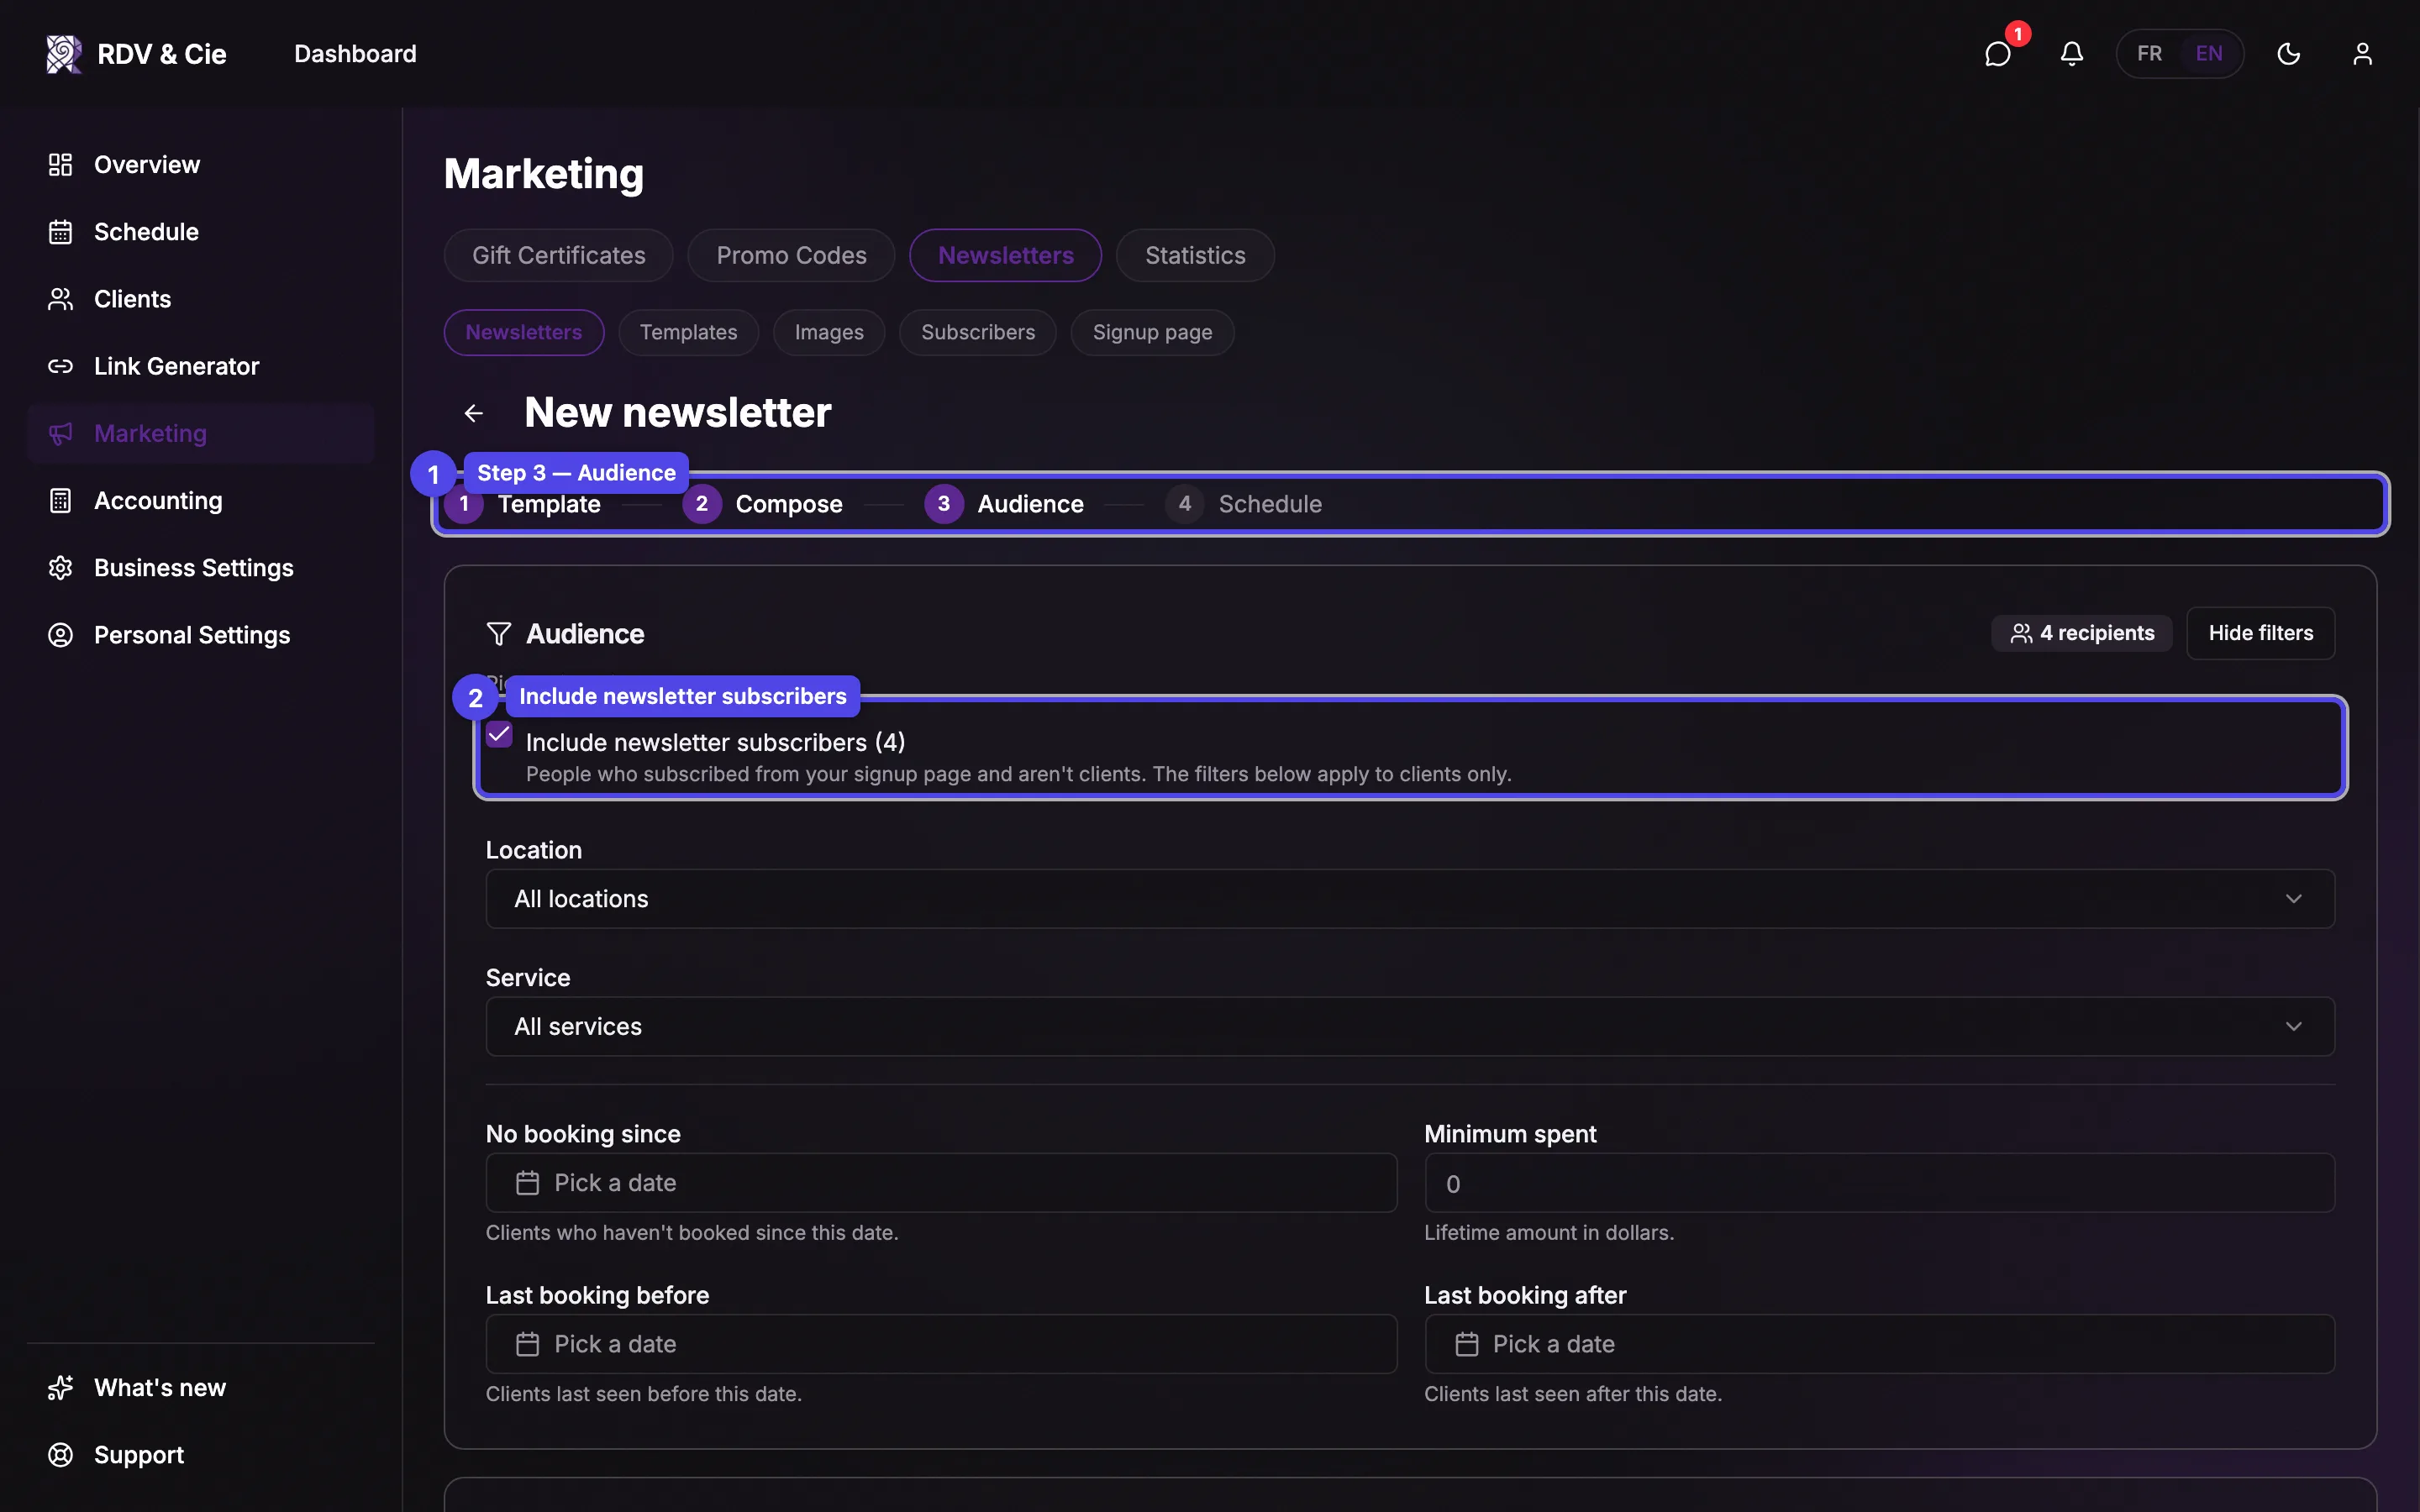
Choose who receives the newsletter with the audience filters, then pick the people in the Recipients list (Show): everyone the filters match is listed with a checkbox, ticked by default. Untick a name to leave that person out; ticking it again adds them back.
- Select all and Deselect all tick or untick everyone at once. To send to a few people only, click Deselect all, then tick them.
- Shift-click a second checkbox to tick or untick every name in between.
- Search by name, email or phone to find a client directly. While searching, Select all matching and Deselect all matching act on every result.
- All, Selected and Not selected switch which names are listed, so you can review who you left out.
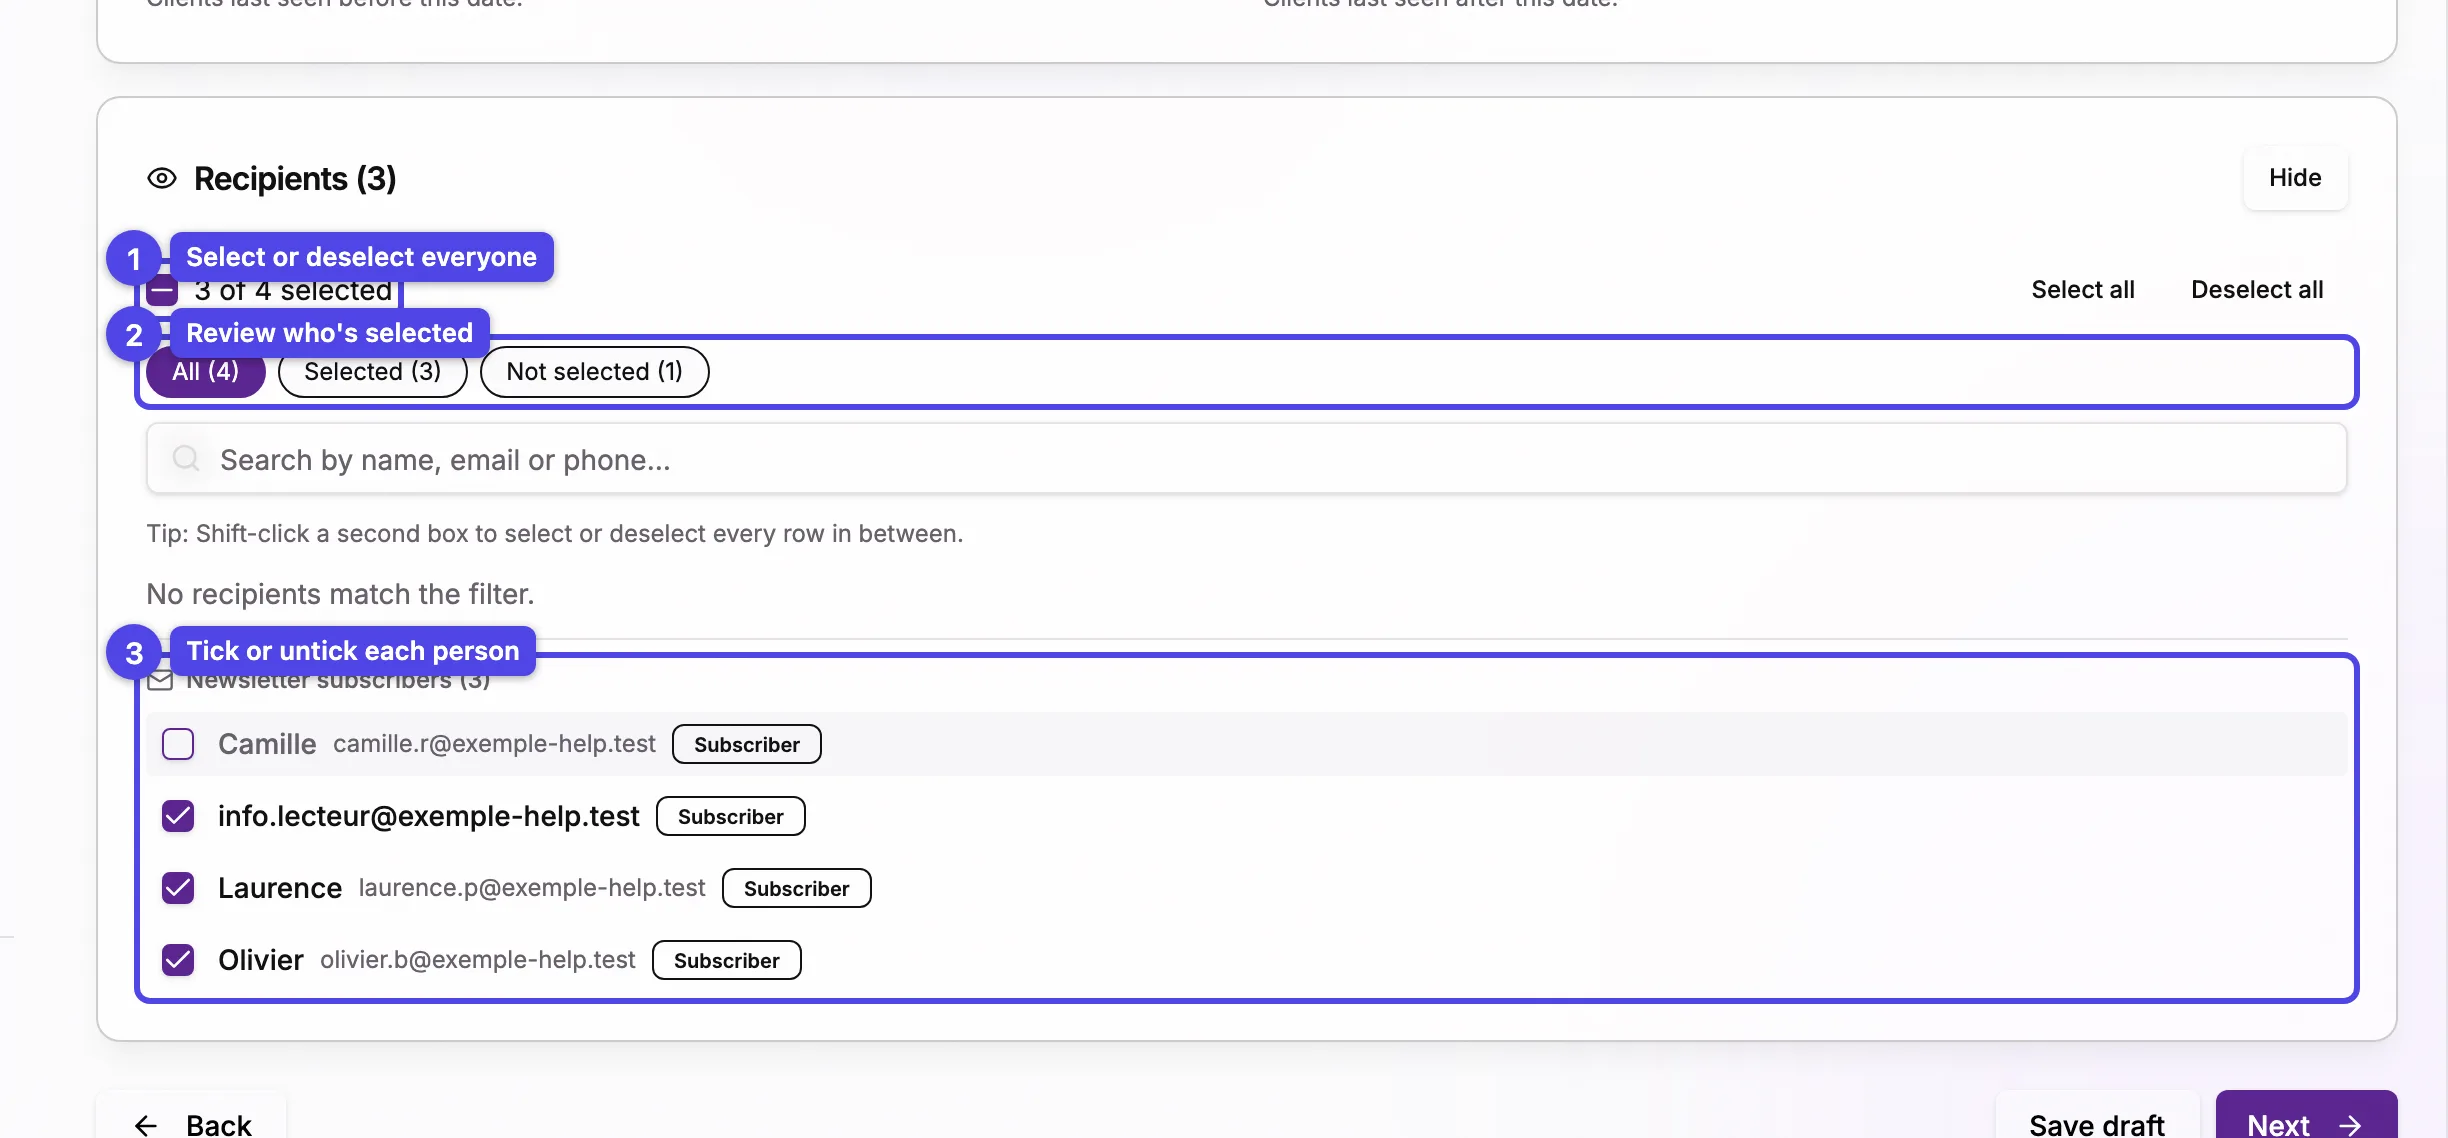
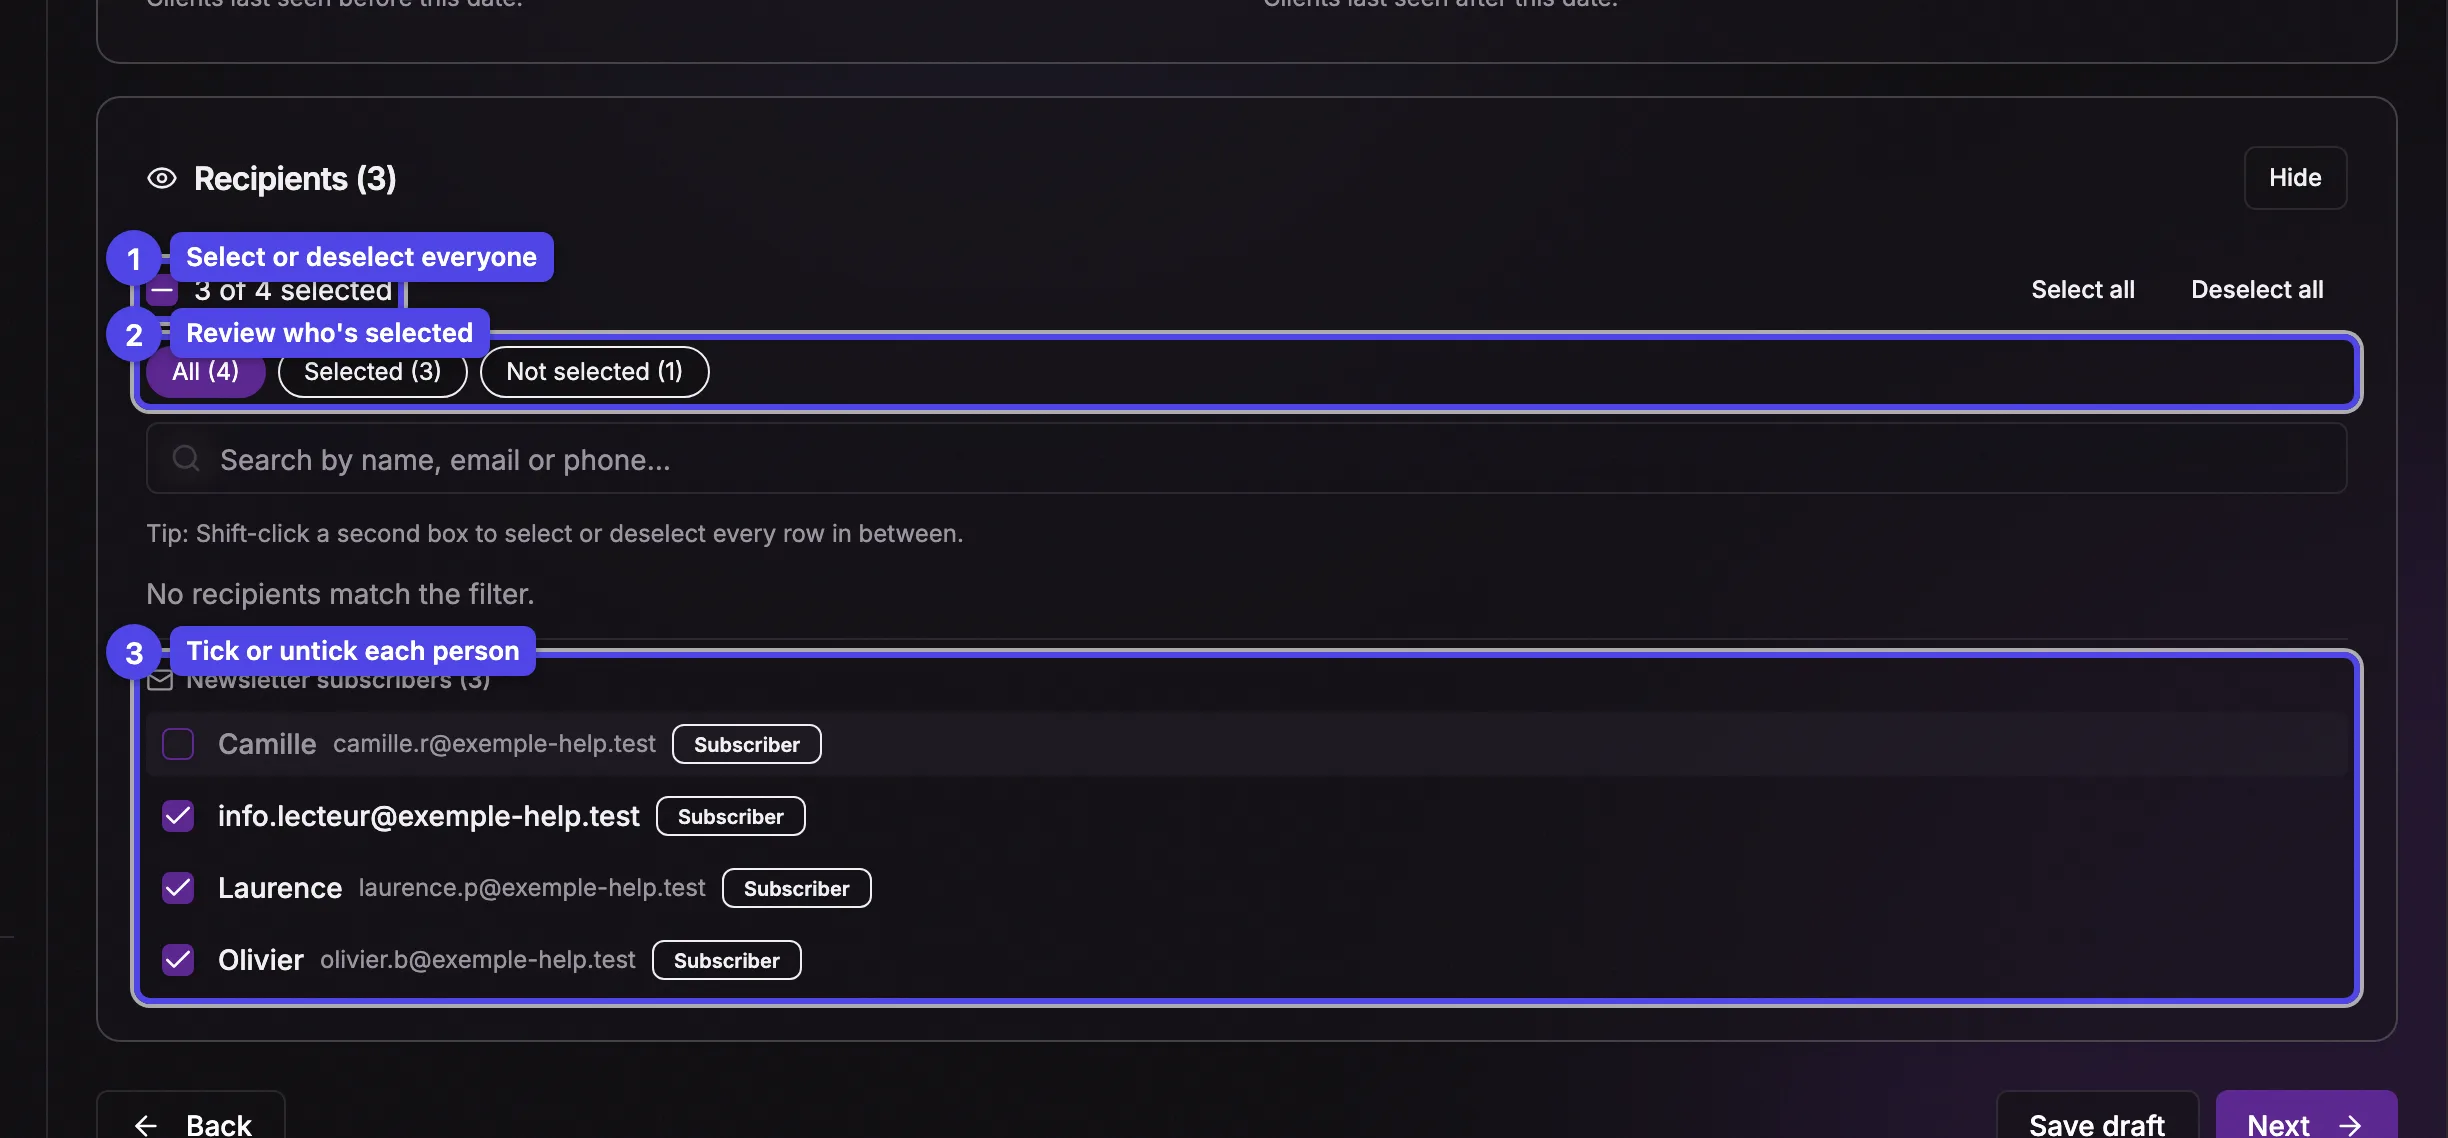
The list loads 100 recipients at a time: click Load more to see the next ones. A client who no longer accepts newsletters is never sent one, even when ticked.
When SMS is on, a badge shows how many recipients are SMS-eligible (consent and a phone number are required), which can differ from the email count.
When you have newsletter subscribers, an Include newsletter subscribers (N) checkbox appears at the top of the audience card, ticked by default — untick it to send to your clients only. The audience filters apply to clients only. Subscribers are listed under the recipients with a Subscriber badge and a checkbox, like clients. They receive the email, never the SMS, and someone whose email belongs to one of your clients gets the newsletter once, as the client.
Step 4 — Schedule
Pick Send now or Schedule for later. Scheduling reveals a date and time picker — in your business's time zone, even when you're travelling. The button at the bottom-right becomes Send now or Schedule, and a confirmation dialog summarizes the send.
Marketing consent is re-checked at send time, so anyone who unsubscribes between launching and sending is skipped automatically. Booking-related messages are transactional and aren't affected by this.
A newsletter only launches when every variable in its subject, content and SMS text is one the editor offers (client name, business name, booking link, and the newsletter link in the SMS). A misspelled or unknown variable blocks the launch with a message naming the available ones.
What recipients see at the bottom
Every newsletter email ends with your business's name, mailing address and a way to reach you, as anti-spam law requires. The address comes from Billing Address in your business settings (or your first location's address, or its city); the contact from Business Email or Public Phone. The same lines show in the editor's footer preview.
The Unsubscribe link opens a confirmation page where the client confirms with Unsubscribe; mail apps' own unsubscribe button works in one click. Unsubscribing stops your email and SMS newsletters for that client; their appointment messages keep coming.
The wizard warns you before leaving with unsaved changes. Use Save draft at any step to keep your work and come back later.