Complete a booking
Walk through the completion wizard — payment method, tip, receipt and notes — or mark a no-show.
Updated 2026-06-15
When a client's appointment is done, you complete it from the schedule. The completion wizard captures how they paid, an optional tip, and whether to generate an insurance receipt or follow-up notes. If the client didn't show up, you mark a no-show instead.
Open the wizard
Click the booking
On the schedule grid, click the booking card to open its detail dialog.
Click Pay
In the dialog footer, click Pay. The detail dialog closes and the completion wizard opens on the first step.
Pay is available while a booking is Confirmed. Pending bookings must be approved first; completed and no-show bookings show Revert to Confirmed instead. See Manage a booking for the full list of actions by status.
Step 1 — Payment Method
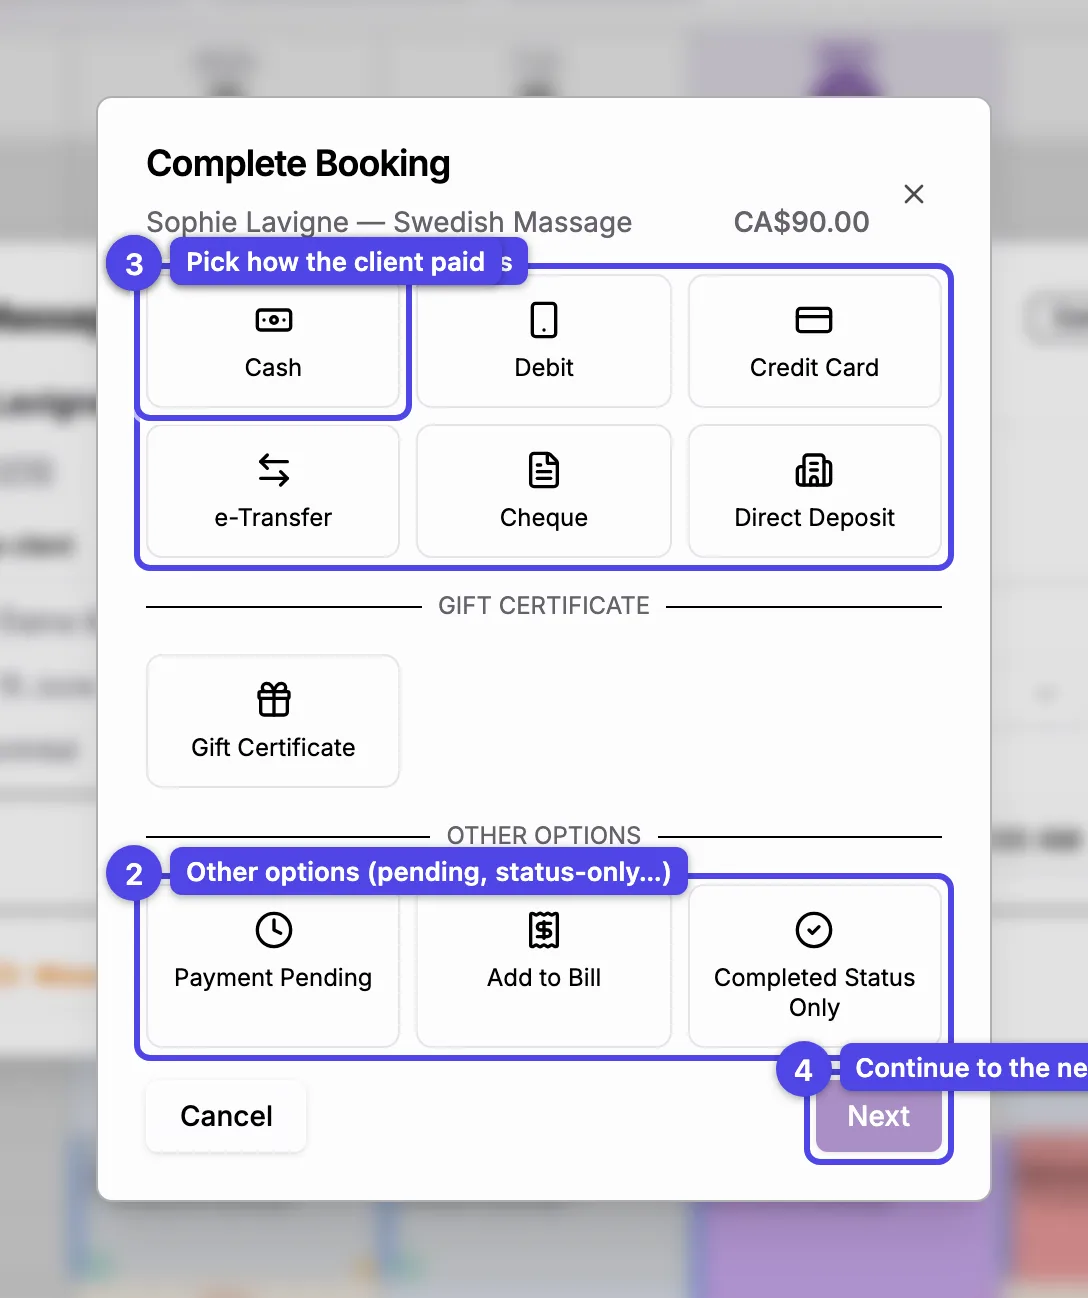
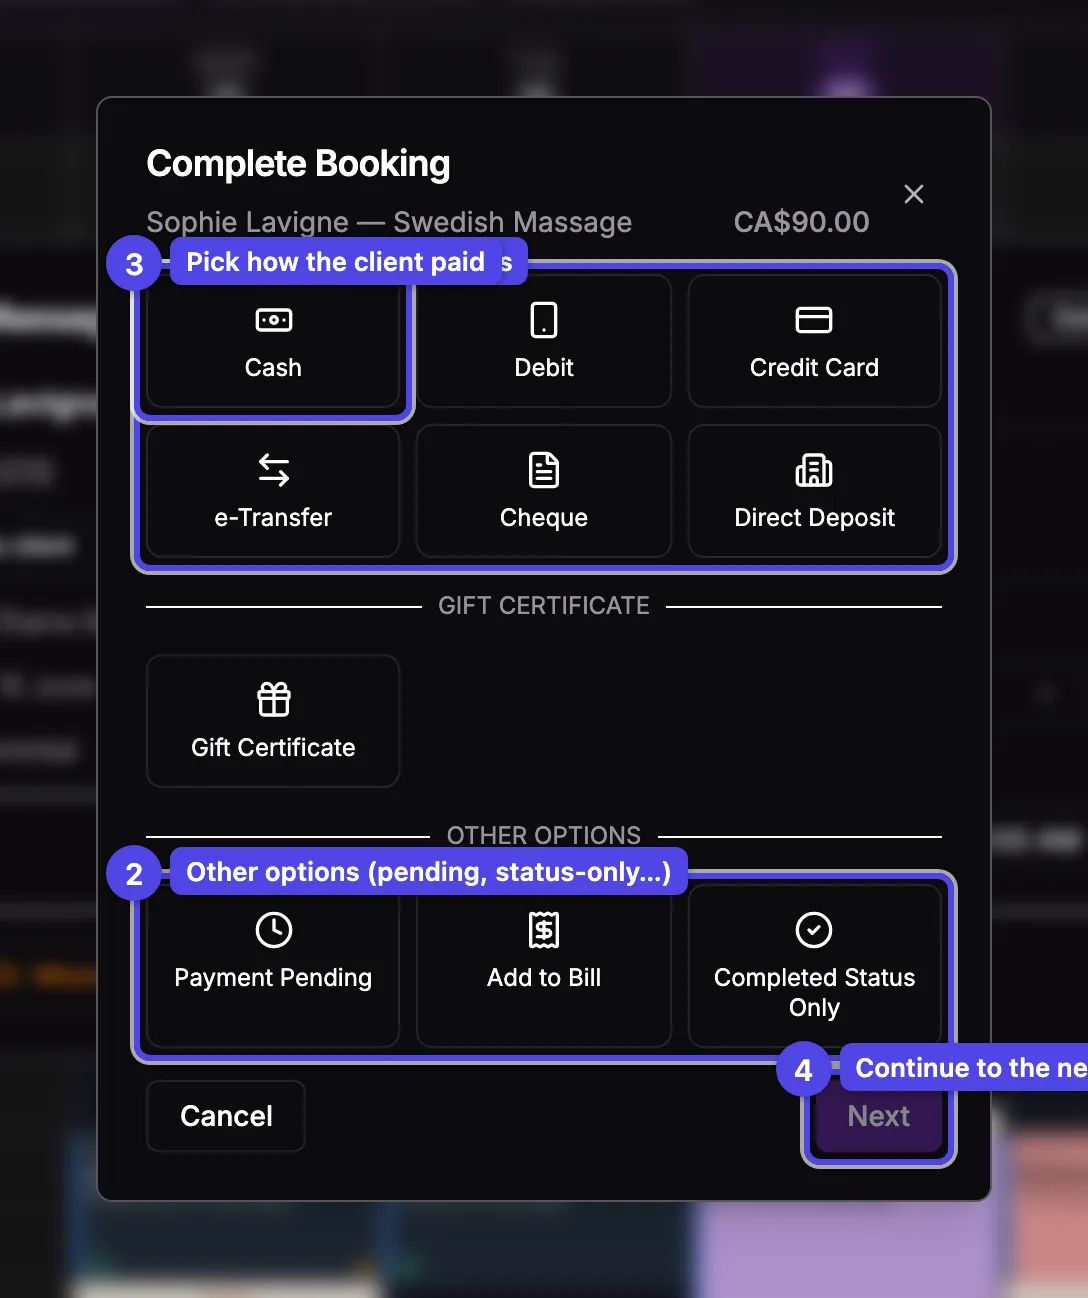
Pick how the client paid. The numbers match the screenshot:
- Manual payment methods — Cash, Debit, Credit Card, e-Transfer, Cheque, Direct Deposit. Use these when you handle the payment outside the app.
- Other Options — Payment Pending (mark complete, collect later), Add to Bill (when there are open bills), and Completed Status Only (no payment recorded).
- Pick a method — tap a tile to select it; the wizard tailors the next steps to your choice.
- Next — continue once a method is selected.
If Square or Stripe is connected, extra sections appear — Card on File, Payment Link, Terminal, and (on the mobile app) Tap to Pay — plus a Gift Certificate section. Card, terminal and payment-link methods add a Payment Processing step that charges the client; manual methods skip it.
Step 2 — Tip & Details
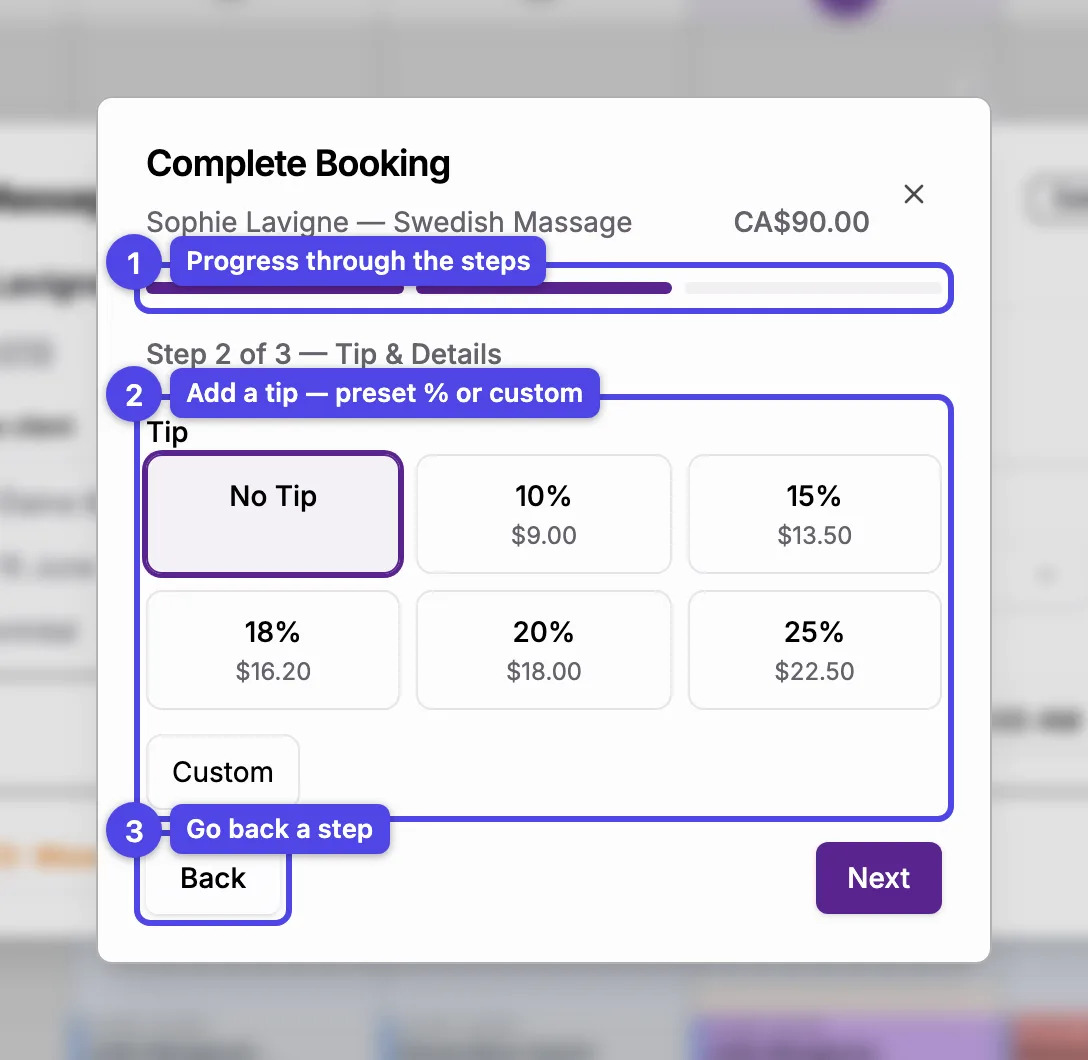
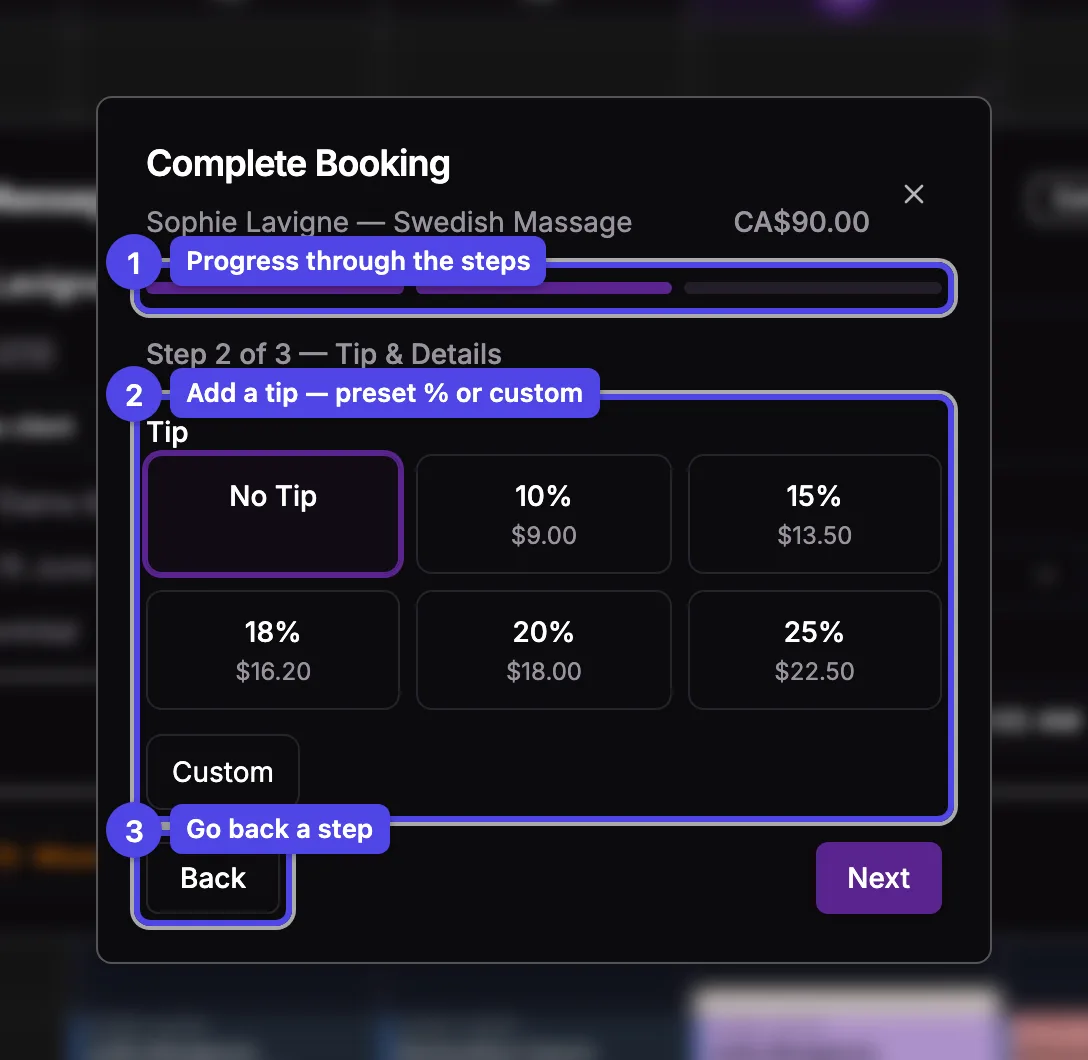
- Step indicator — the bars track your progress through the wizard.
- Tip — choose a preset percentage (No Tip, 10%, 15%, 18%, 20%, 25%) or Custom to enter an exact amount. The tip total shows below.
- Back — return to the previous step at any time.
For Card on File the wizard shows a card picker here; for Add to Bill it shows the open-bill picker instead of the tip controls.
Step 3 — Receipt & Notes
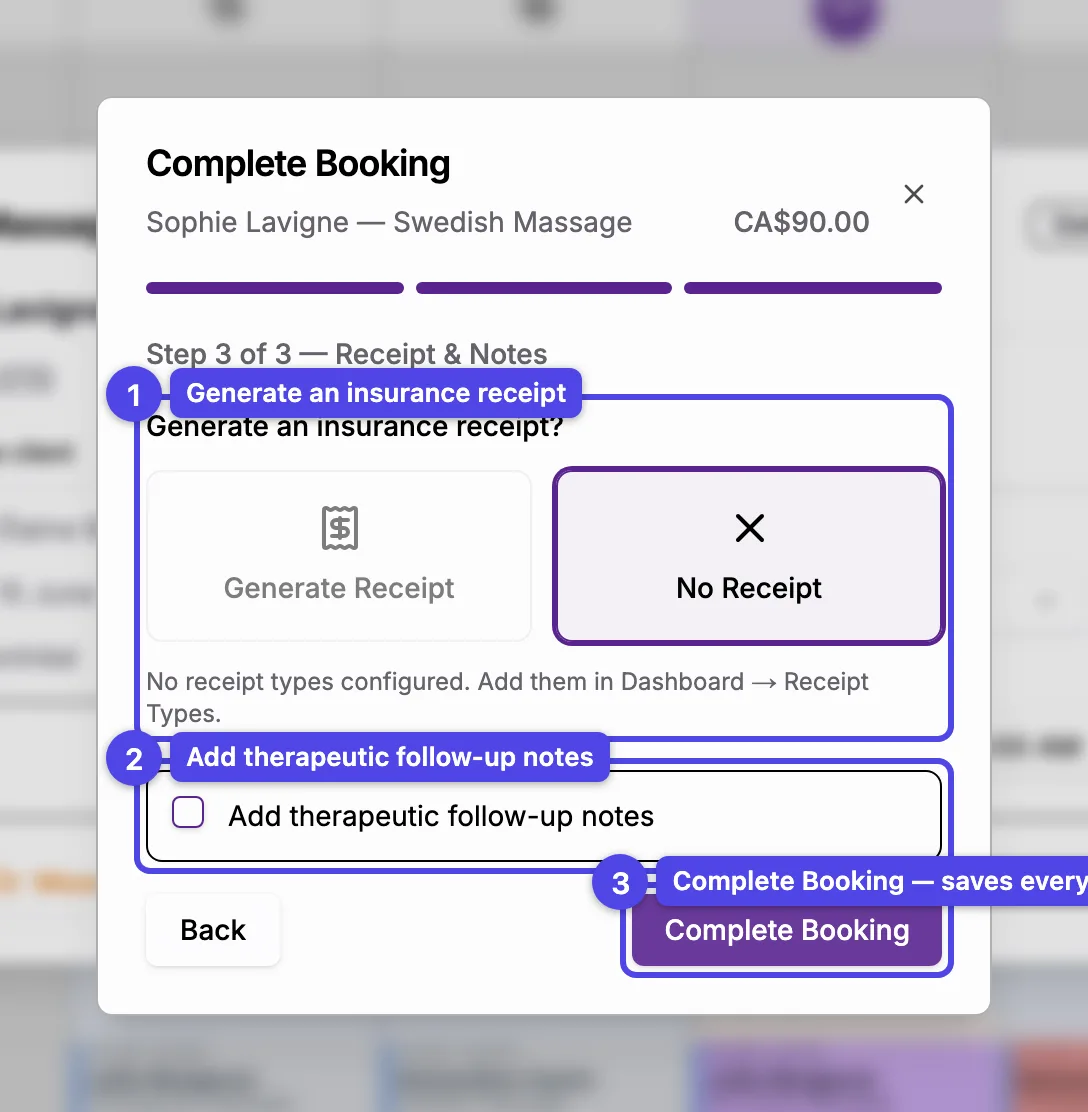
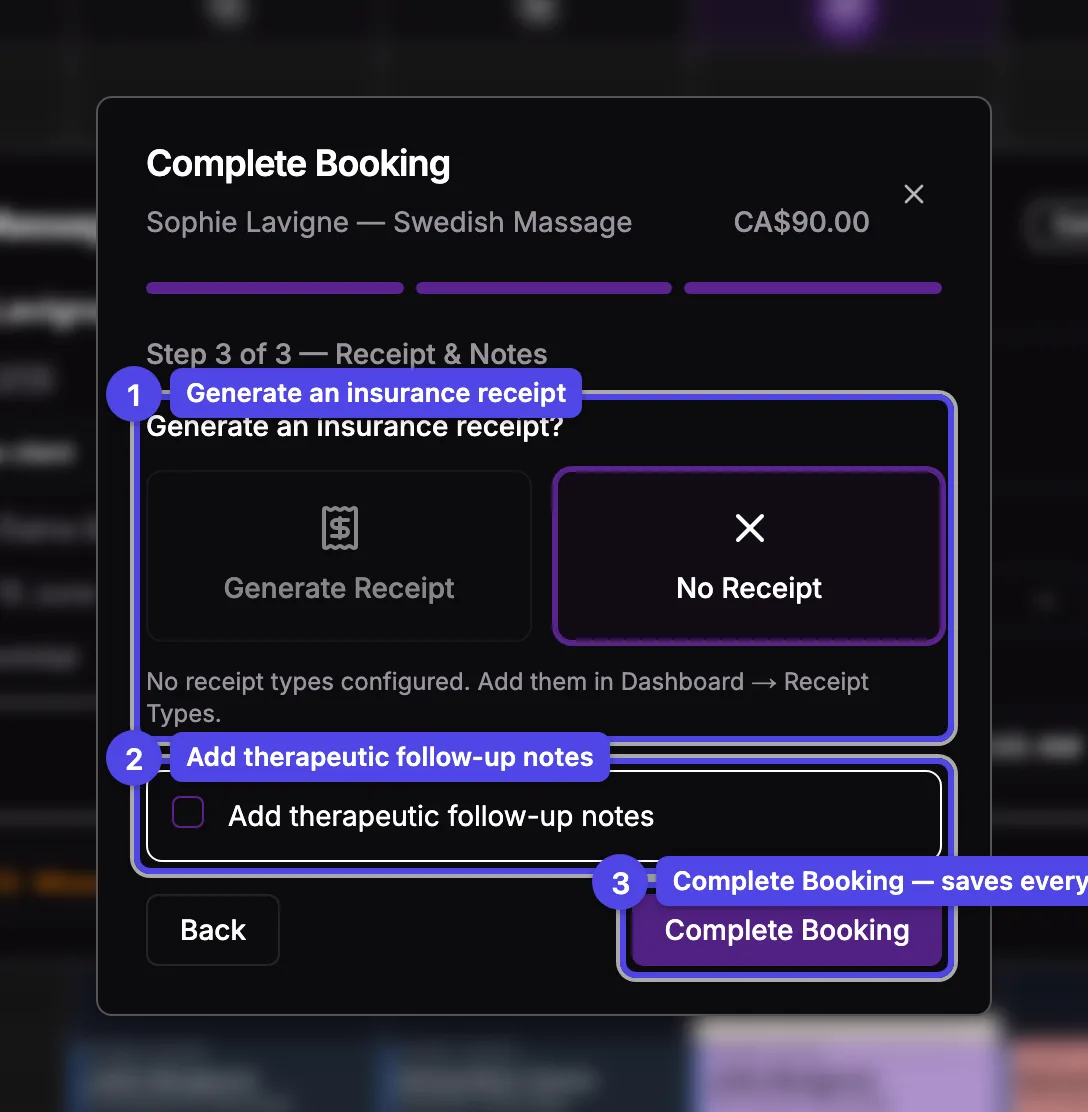
- Generate an insurance receipt? — choose Generate Receipt or No Receipt. When you generate one, pick the receipt type below.
- Add therapeutic follow-up notes — tick this to record session notes (and, on the standard form, a body diagram) at the same time.
- Complete Booking — saves the payment, tip, receipt and notes, and marks the booking Completed.
You can't generate a receipt until at least one receipt type exists. If the button is disabled and you see "No receipt types configured", add one in Dashboard → Receipt Types first.
Mark a no-show
When a client misses an appointment, mark it as a no-show instead of completing it.
Click the booking
Open the booking's detail dialog from the schedule.
Click Missed Appointment
Click Missed Appointment in the footer. A confirmation dialog appears.
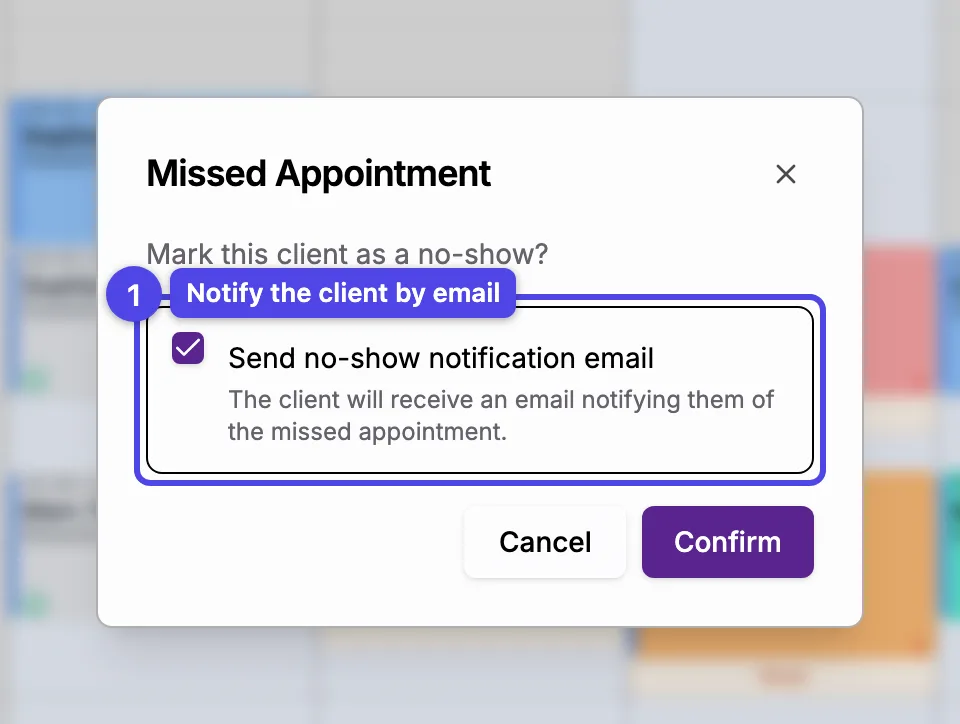
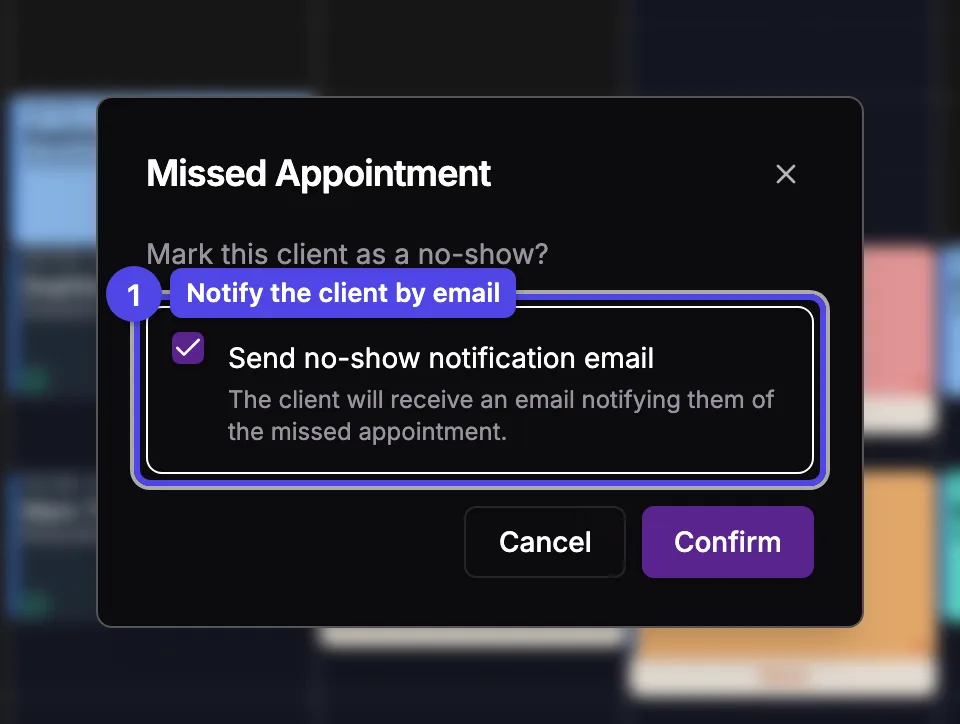
- Send no-show notification email — leave this ticked to email the client about the missed appointment, or untick it to mark the no-show silently. Confirm to apply.
If the client has a card on file, the dialog instead offers Charge no-show fee to card on file with a percentage to charge. You can also charge the fee later from the booking's detail dialog once it's marked as a no-show.
What's next
- Manage a booking — every action you can take on a booking by status.
- Punctual availability — open up a one-off slot outside your regular hours.